RCC Settings
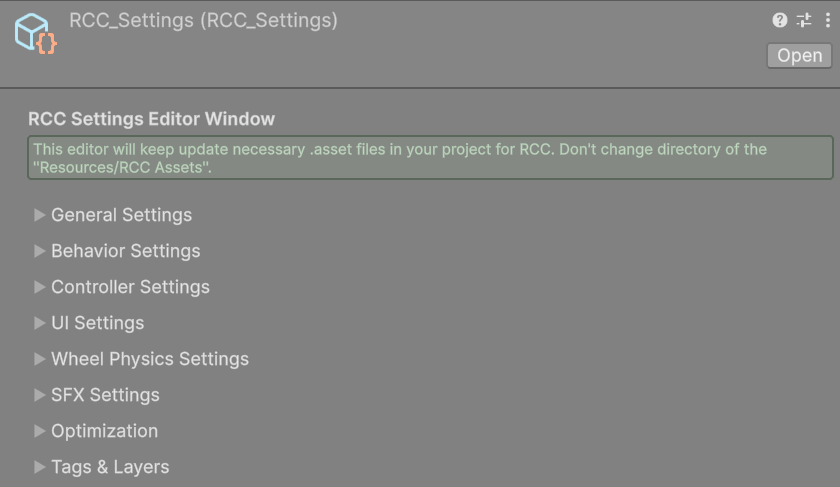
RCC Settings is the asset that holds RCC's global options: physics timing, behavior presets, controller and mobile options, sounds, optimization, layers and the prefabs RCC spawns. This page lists every inspector section with its shipped value.
The asset is Assets/RealisticCarControllerV4/Resources/RCC Assets/RCC_Settings.asset. Don't move or rename it; RCC loads it from Resources/RCC Assets/.
Quick Start
- Open Tools → BoneCracker Games → Realistic Car Controller → Edit RCC Settings. The asset opens in the Inspector.
- Expand a section (General Settings, Behavior Settings, and so on).
- Change the values in Edit mode. Your changes are saved to the asset.
- Press Play to test.
Play Mode Uses a Copy
In Play mode, RCC_Settings.Instance returns a runtime copy of the asset. Changes made in Play mode, from code or from the Inspector opened with Edit RCC Settings, affect only the running game. They are lost when you stop Play mode.
To keep a change, make it in Edit mode.
Changed in V6: in Edit mode,
RCC_Settings.Instancealways returns the asset itself. Earlier versions could return a leftover Play mode copy after you stopped playing, so edits made through it were lost.
General Settings
These values are applied when the RCC Scene Manager starts (timestep, FPS, cursor) or when a vehicle or wheel is created (angular velocity, wheel colliders).
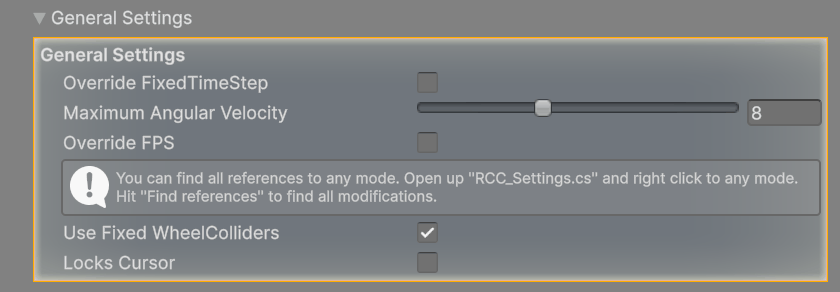
| Inspector label | What it does | Range | Shipped value |
|---|---|---|---|
| Override FixedTimeStep | Sets Time.fixedDeltaTime to Fixed Timestep when a scene starts. |
— | Off |
| Fixed Timestep | Physics step in seconds. Shown only while Override FixedTimeStep is on. | 0.005 – 0.06 | 0.02 |
| Maximum Angular Velocity | Maximum spin speed (rad/s) of each vehicle's Rigidbody. | 0.5 – 20 | 8 |
| Override FPS | Sets Application.targetFrameRate to Maximum FPS when a scene starts. |
— | Off |
| Maximum FPS | Frame rate cap. Shown only while Override FPS is on. | 15 – 240 | -1 (not used while Override FPS is off) |
| Use Fixed WheelColliders | Sets each WheelCollider's mass to the vehicle's mass ÷ 25 for more stable physics. | — | On |
| Locks Cursor | Locks the mouse cursor when a scene starts. RCC never unlocks it; unlock it from your own code (for example, in a pause menu). | — | Off |
Behavior Settings
Behavior presets override wheel friction, driving helpers and other handling values on every vehicle. The preset list and what each preset changes are covered in Behavior Presets.
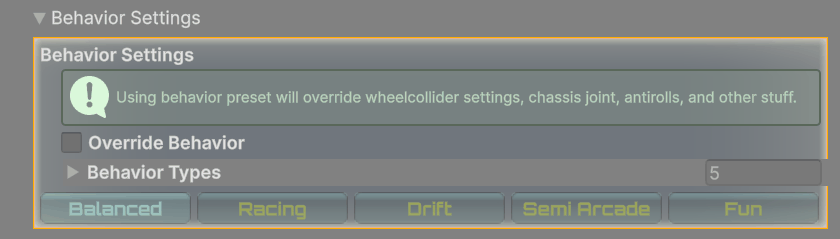
| Inspector label | What it does | Shipped value |
|---|---|---|
| Override Behavior | Applies the selected preset to all vehicles. The fields below are greyed out while this is off. | Off |
| Behavior Types | The list of presets. Add an element to create your own. | 5 presets |
| Preset buttons | Selects the active preset (Balanced, Racing, Drift, Semi Arcade, Fun). | Balanced |
To keep one vehicle out of the global preset, enable Ignore Global Behavior Preset in that vehicle's inspector.
RCC.SetBehavior(int) switches the preset at runtime and turns Override Behavior on.
Controller Settings
The Edit Inputs button selects the RCC Input Actions asset so you can edit the key and gamepad bindings. See Input System.
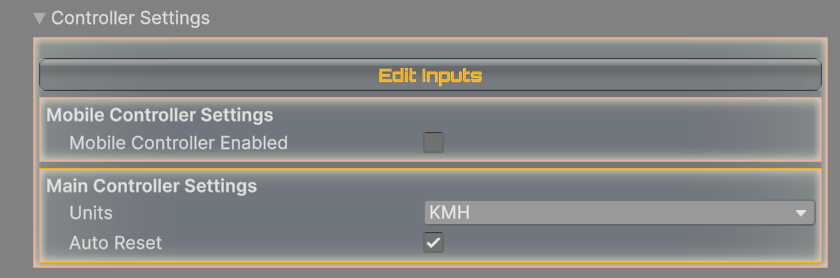
Mobile Controller Settings
Mobile Controller Enabled (ships off), Mobile Controller Type and the touch sensitivity fields. Every field, its shipped value and the V6 platform sync are in Mobile Setup.
Main Controller Settings
| Inspector label | What it does | Shipped value |
|---|---|---|
| Units | Speed unit on the dashboard: KMH or MPH. | KMH |
| Auto Reset | Puts a vehicle back on its wheels after it has been tipped over at low speed for 3 seconds. | On |
UI Settings

| Inspector label | What it does | Shipped value |
|---|---|---|
| Use Telemetry | Spawns the RCC Telemetry Canvas prefab when a scene starts. The overlay shows live vehicle data for debugging. | Off |
Wheel Physics Settings
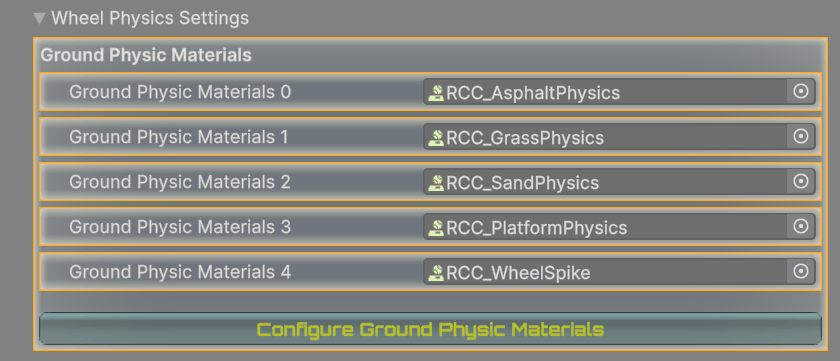
This section lists the physic materials defined in the RCC Ground Materials asset. Click Configure Ground Physic Materials to open that asset and edit the surfaces. See Ground Physics.
SFX Settings
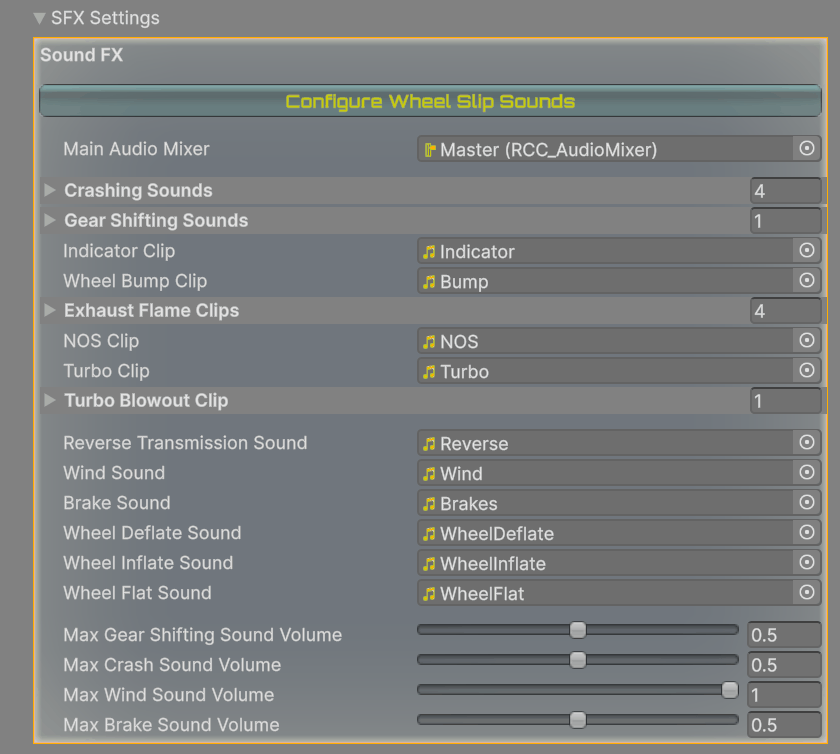
Click Configure Wheel Slip Sounds to open the RCC Ground Materials asset, where each surface has its own wheel slip sound.
| Inspector label | What it does | Shipped value |
|---|---|---|
| Main Audio Mixer | Audio Mixer Group that all RCC sounds play through. | RCC_AudioMixer |
| Crashing Sounds | Collision clips, one picked at random. | 4 clips |
| Gear Shifting Sounds | Gear shift clips, one picked at random. | 1 clip |
| Indicator Clip | Turn indicator tick. | Assigned |
| Wheel Bump Clip | Suspension bump sound. | Assigned |
| Exhaust Flame Clips | Exhaust backfire pops. | 4 clips |
| NOS Clip | NOS boost sound. | Assigned |
| Turbo Clip | Turbo spool sound. | Assigned |
| Turbo Blowout Clip | Blow-off sounds. | 1 clip |
| Reverse Transmission Sound | Plays while in reverse gear. | Assigned |
| Wind Sound | Wind noise that rises with speed. | Assigned |
| Brake Sound | Brake squeal. | Assigned |
| Wheel Deflate Sound | Plays when a tire deflates. | Assigned |
| Wheel Inflate Sound | Plays when a tire is repaired. | Assigned |
| Wheel Flat Sound | Loop while driving on a flat tire. | Assigned |
| Max Gear Shifting Sound Volume | Volume cap, 0 – 1. | 0.5 |
| Max Crash Sound Volume | Volume cap, 0 – 1. | 0.5 |
| Max Wind Sound Volume | Volume cap, 0 – 1. | 1 |
| Max Brake Sound Volume | Volume cap, 0 – 1. | 0.5 |
Optimization
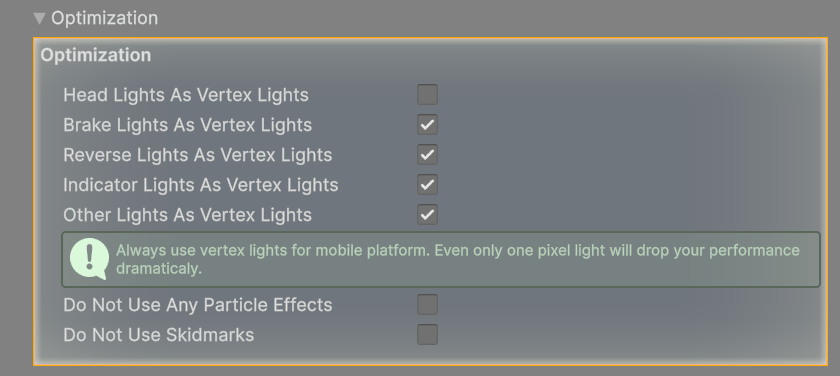
Vertex lights are cheaper than pixel lights. The inspector recommends vertex lights on mobile. See Lights System.
| Inspector label | What it does | Shipped value |
|---|---|---|
| Head Lights As Vertex Lights | Renders headlights as vertex lights. | Off |
| Brake Lights As Vertex Lights | Renders brake lights as vertex lights. | On |
| Reverse Lights As Vertex Lights | Renders reverse lights as vertex lights. | On |
| Indicator Lights As Vertex Lights | Renders indicator lights as vertex lights. | On |
| Other Lights As Vertex Lights | Renders all other lights (including exhaust flame lights) as vertex lights. | On |
| Do Not Use Any Particle Effects | Disables wheel and exhaust particle effects. Collision sparks still appear. | Off |
| Do Not Use Skidmarks | Disables skidmarks. | Off |
Tags & Layers
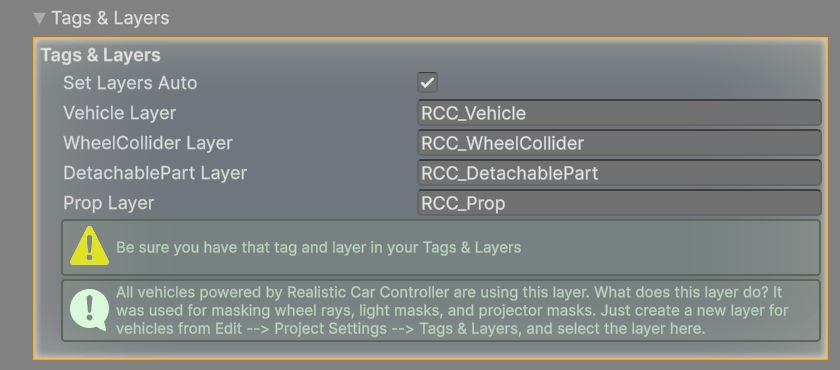
The layer fields appear only while Set Layers Auto is on. The layers must exist in Edit → Project Settings → Tags and Layers.
| Inspector label | What it does | Shipped value |
|---|---|---|
| Set Layers Auto | On editor load, RCC checks that the layers below exist and offers to add missing ones. Editing a vehicle in its inspector assigns the layers to its objects. If the layers don't exist, RCC turns this option off. | On |
| Vehicle Layer | Layer for the vehicle body. | RCC_Vehicle |
| WheelCollider Layer | Layer for wheel colliders. | RCC_WheelCollider |
| DetachablePart Layer | Layer for detachable parts (doors, hood, bumpers). | RCC_DetachablePart |
| Prop Layer | Layer for props (cones, barriers). | RCC_Prop |
Resources
The prefabs and assets RCC spawns or assigns. Replace them only with your own versions of the same type.
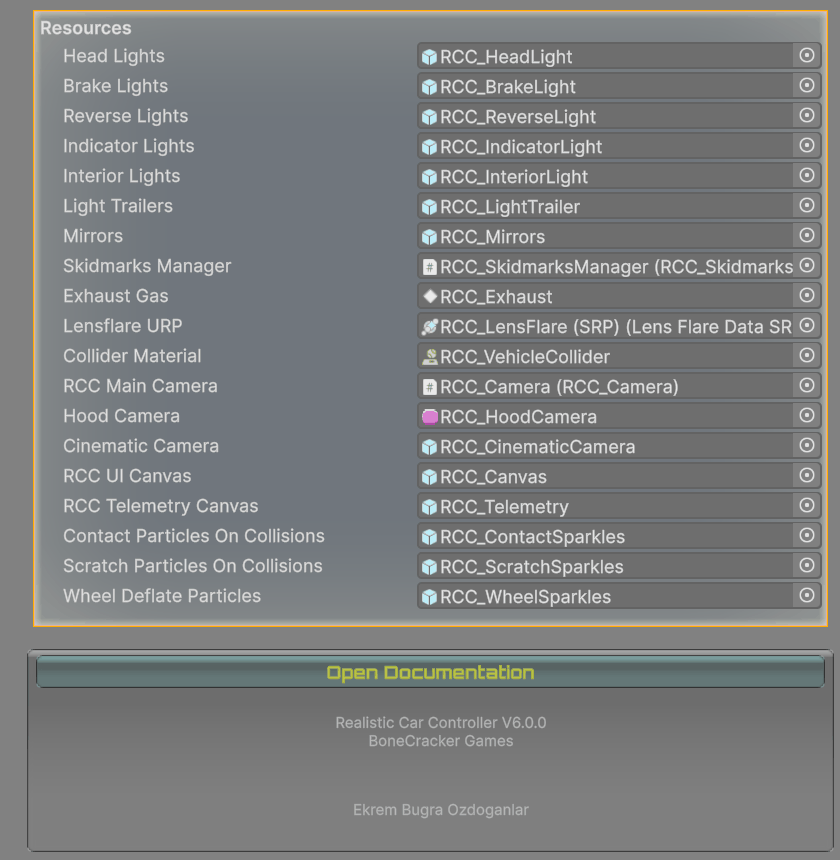
| Inspector label | What it does | Shipped value |
|---|---|---|
| Head Lights | Headlight prefab added to vehicles. | RCC_HeadLight |
| Brake Lights | Brake light prefab. | RCC_BrakeLight |
| Reverse Lights | Reverse light prefab. | RCC_ReverseLight |
| Indicator Lights | Indicator light prefab. | RCC_IndicatorLight |
| Interior Lights | Interior light prefab. | RCC_InteriorLight |
| Light Trailers | Trailer light prefab. | RCC_LightTrailer |
| Mirrors | Side mirror prefab. | RCC_Mirrors |
| Skidmarks Manager | Skidmarks manager prefab. | RCC_SkidmarksManager |
| Exhaust Gas | Exhaust smoke prefab. | RCC_Exhaust |
| Lensflare URP | The single SRP lens flare asset assigned to vehicle lights in URP and HDRP. | RCC_LensFlare (SRP) |
| Collider Material | Physic material the Quick Vehicle Setup Wizard assigns to the body collider it adds. | RCC_VehicleCollider |
| RCC Main Camera | Main follow camera prefab. | RCC_Camera |
| Hood Camera | Hood camera prefab. | RCC_HoodCamera |
| Cinematic Camera | Cinematic camera prefab. | RCC_CinematicCamera |
| RCC UI Canvas | UI canvas prefab (dashboard and mobile controls). | RCC_Canvas |
| RCC Telemetry Canvas | Telemetry overlay prefab, spawned when Use Telemetry is on. | RCC_Telemetry |
| Contact Particles On Collisions | Particles at collision contact points. | RCC_ContactSparkles |
| Scratch Particles On Collisions | Particles while scraping. | RCC_ScratchSparkles |
| Wheel Deflate Particles | Particles when a wheel deflates. | RCC_WheelSparkles |
Three fields are not shown in the inspector:
- HDRP Volume Profile Prefab: empty in the shipped asset. In an HDRP project, RCC fills it automatically on editor load with
RCC_VolumeProfile_HDRP.prefabfrom the HDRP payload. See Render Pipelines. - Default Decal Material / Default Neon Material: used by the customization system (
Decal_0,Neon_White). See Customization.
The Open Documentation button at the bottom opens the offline HTML documentation. If the files are missing, it opens the online documentation.
Changing Settings from Code
At runtime, change values on RCC_Settings.Instance. The change lasts until Play mode stops (or the app closes).
using UnityEngine;

public class MyOptionsMenu : MonoBehaviour {

    // Hook these up to UI buttons.

    public void UseMPH() {
        RCC_Settings.Instance.units = RCC_Settings.Units.MPH;
    }

    public void UseDriftPreset() {
        RCC.SetBehavior(2);   // Index into Behavior Types. Shipped: 2 = Drift. Turns Override Behavior on.
    }

    public void UseMobileJoystick() {
        RCC_Settings.Instance.mobileControllerEnabled = true;
        RCC.SetMobileController(RCC_Settings.MobileController.Joystick);
    }

}
Values that are applied when a scene or vehicle starts (Override FixedTimeStep, Override FPS, Locks Cursor, Maximum Angular Velocity, Use Fixed WheelColliders) don't take effect if you change them later at runtime.
To save a change to the asset from code, do it in Edit mode with an editor script. RCC_Settings.Instance returns the asset there:
using UnityEditor;

public static class MyRCCSettingsTools {

    [MenuItem("Tools/My Game/Cap FPS At 60")]
    public static void CapFPS() {

        RCC_Settings settings = RCC_Settings.Instance;

        Undo.RecordObject(settings, "Cap FPS At 60");
        settings.overrideFPS = true;
        settings.maxFPS = 60;
        EditorUtility.SetDirty(settings);
        AssetDatabase.SaveAssetIfDirty(settings);

    }

}
Put this script in an Editor folder.