AI System
This page covers RCC's built-in AI driver (RCC_AICarController): setting up an AI car, its three navigation modes, waypoints, brake zones, and spawning AI cars from code.
Quick Start
- Bake a NavMesh on your road: install the AI Navigation package (Window → Package Manager), add a NavMesh Surface component to your level, and click Bake. The AI steers along NavMesh paths, so this step is required.
- Tools → BoneCracker Games → Realistic Car Controller → AI → Add Waypoints Container To Scene.
- With the new Waypoints Container selected, Shift + Left Click on the road in the Scene view to place waypoints in driving order. The road needs a collider.
- Select an RCC vehicle and choose Tools → BoneCracker Games → Realistic Car Controller → AI → Add AI Controller To Vehicle. Or drag in
Prefabs/Vehicles/Skyline (AI Chaser).prefab, which already has the AI controller. - Press Play. The car drives the waypoints in a loop.
The RCC_City and RCC_City_AIO demo scenes contain a working setup (baked NavMesh, waypoints and an AI car).
How It Works
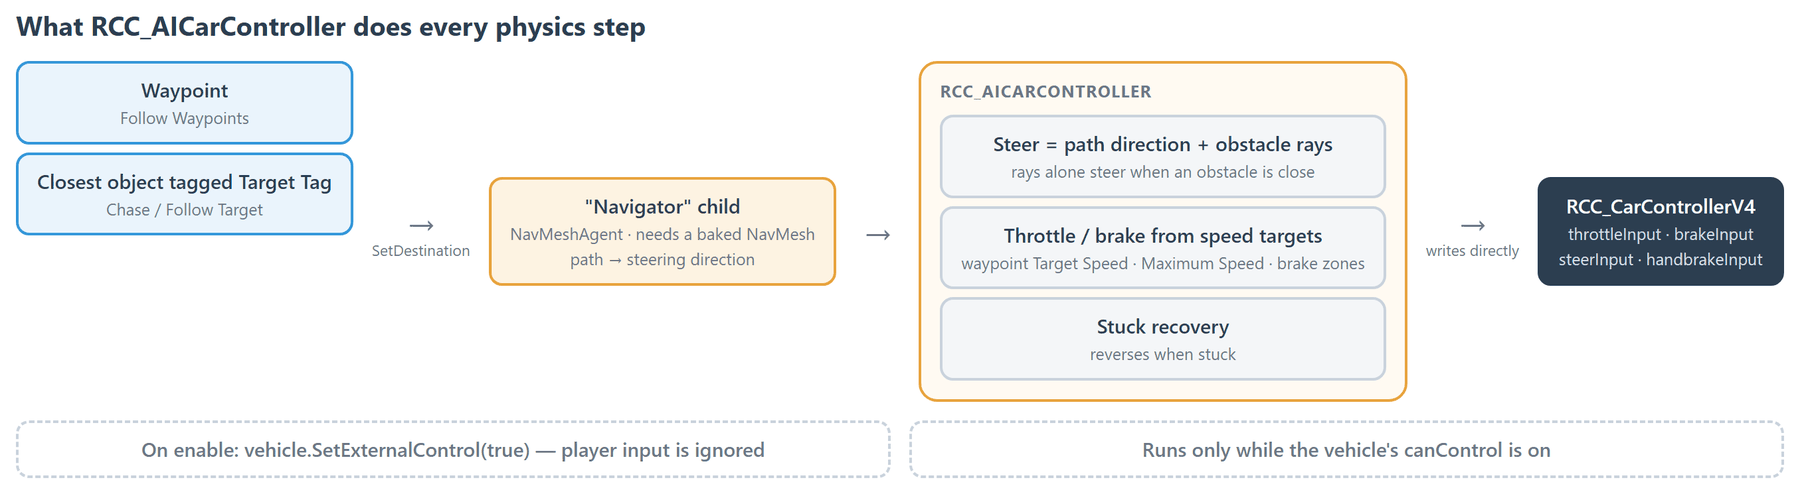
- In
Awake, the AI creates a child GameObject named Navigator with aNavMeshAgent. The agent computes the path to the current destination; the AI turns that into steering. - On enable, the AI calls
SetExternalControl(true)on the vehicle, so the vehicle ignores player input. On disable it callsSetExternalControl(false). - Every physics step the AI writes throttle, brake, steer and handbrake directly to the vehicle. It does not use
OverrideInputs. - The AI only runs while the vehicle's canControl is on. A vehicle with control disabled does not drive.
- Above 30 km/h, the AI lifts off the throttle and brakes in proportion to how hard it is steering.
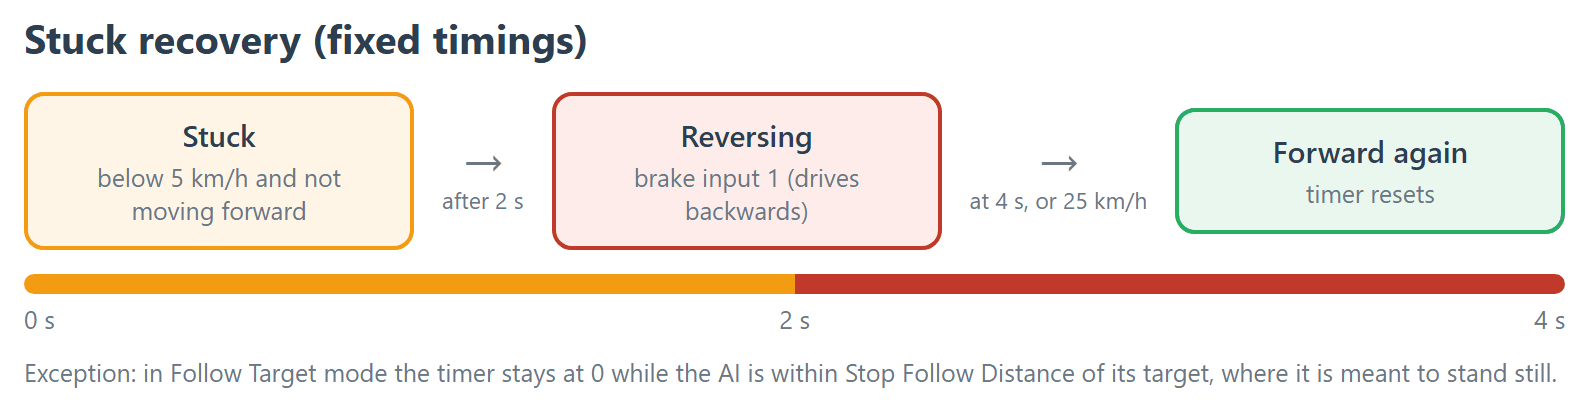
- Stuck recovery (fixed values, not adjustable): below 5 km/h for 2 seconds, the AI reverses. It drives forward again after 4 seconds or once it reaches 25 km/h.
Navigation Modes
Set with Navigation Mode on the AI controller.
| Mode | What the AI does |
|---|---|
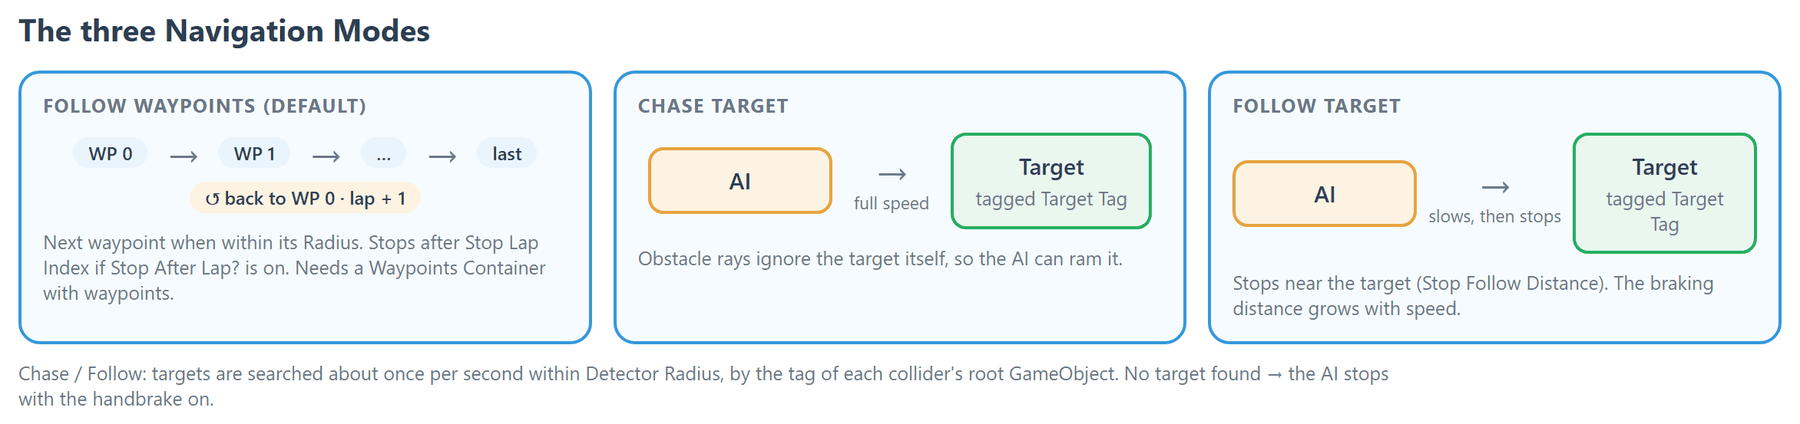
| Follow Waypoints (default) | Drives the waypoints of the Waypoints Container in order. After the last waypoint it returns to the first and counts a lap. Stops if there is no container or it has no waypoints. |
| Chase Target | Drives at full speed toward the closest object tagged Target Tag. Its obstacle rays ignore the target itself. |
| Follow Target | Drives toward the closest object tagged Target Tag, then slows down and stops near it (Stop Follow Distance). |
In Chase Target and Follow Target, the AI searches for targets about once per second, within Detector Radius, by checking the tag of each collider's root GameObject. With no target found, it stops with the handbrake on.
Important: RCC's vehicle prefabs are Untagged. Chase Target and Follow Target find nothing until you tag the player vehicle's root GameObject with the Target Tag (default
Player).
AI Controller Fields
The inspector groups fields into foldouts. Defaults are the values of a freshly added component.
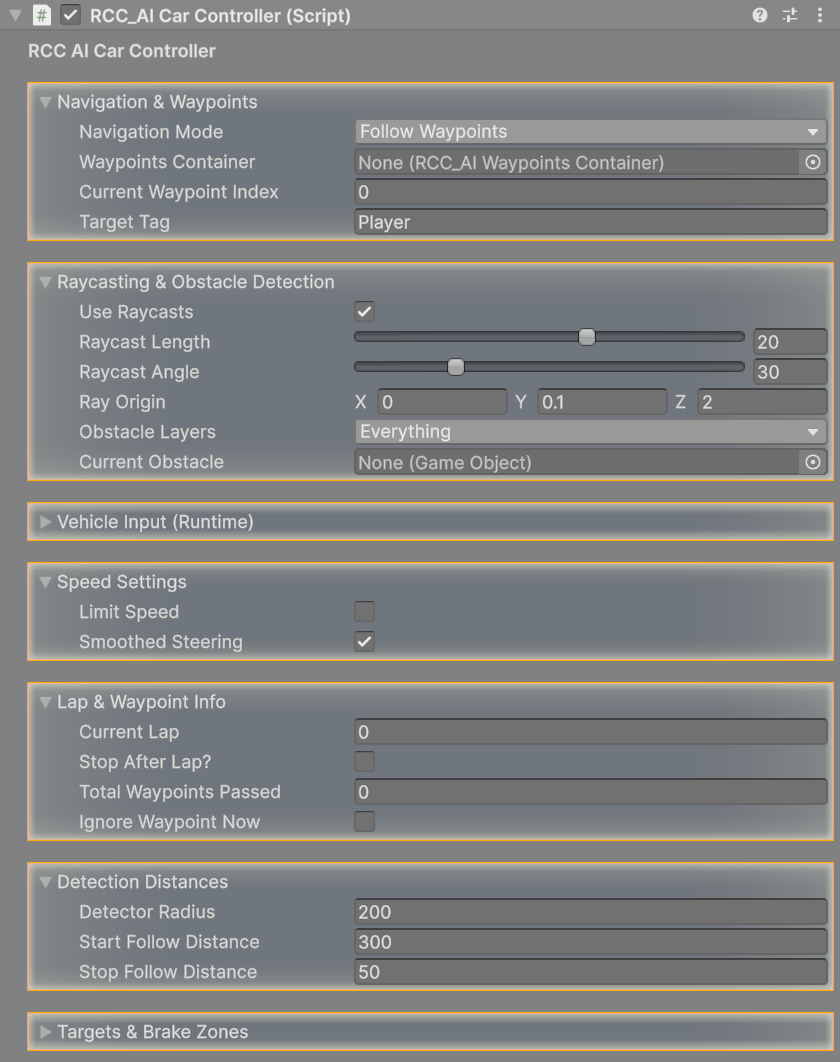
| Inspector label | What it does | Default | Range |
|---|---|---|---|
| Navigation & Waypoints | |||
| Navigation Mode | Follow Waypoints, Chase Target or Follow Target. | Follow Waypoints | |
| Waypoints Container | Path for Follow Waypoints. If empty, the first container found in the scene is used. | None | |
| Current Waypoint Index | Waypoint the AI is driving to. Set it to choose the starting waypoint. | 0 | |
| Target Tag | Tag of the root GameObject to chase or follow. | Player | |
| Raycasting & Obstacle Detection | |||
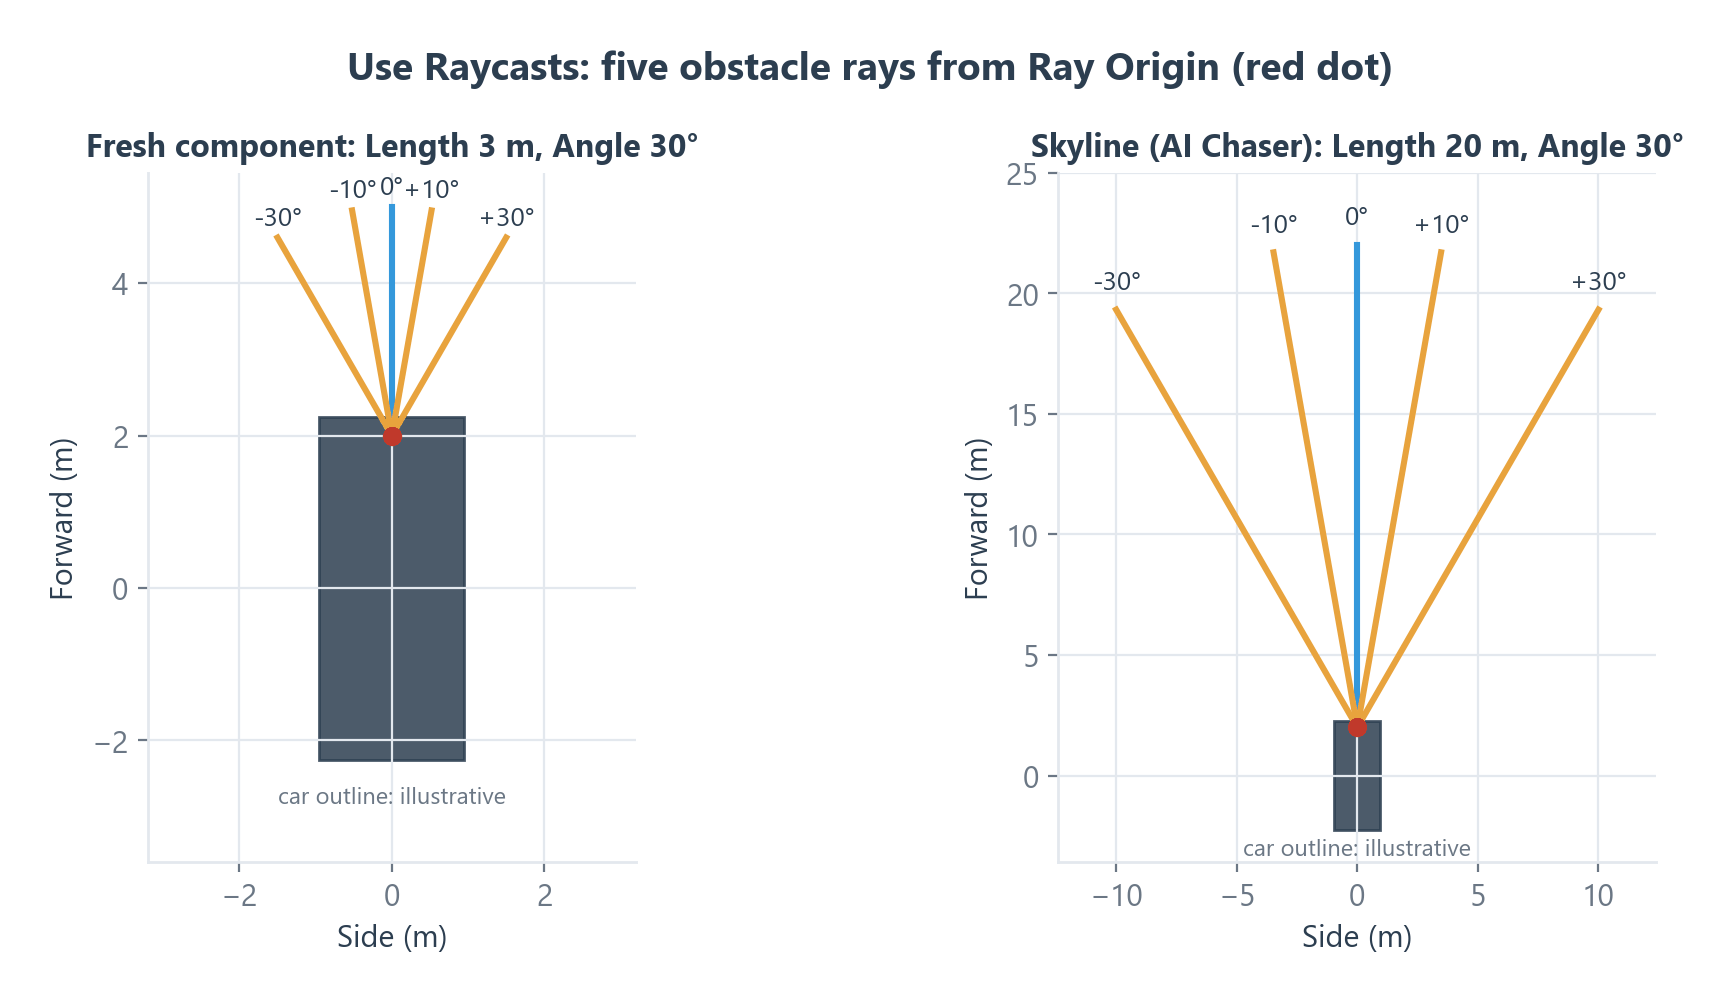
| Use Raycasts | Casts 5 rays forward (straight, ±Raycast Angle ÷ 3, ±Raycast Angle) and steers away from hits. Trigger colliders and the AI's own vehicle are ignored. | On | |
| Raycast Length | Length of the rays in meters. | 3 | 5 – 30 |
| Raycast Angle | Spread of the outer rays in degrees. | 30 | 10 – 90 |
| Ray Origin | Start point of the rays, local to the vehicle. | (0, 0.1, 2) | |
| Obstacle Layers | Layers the rays hit. | Everything | |
| Speed Settings | |||
| Limit Speed | When on, the AI stays below Maximum Speed. When off, it uses the vehicle's own maximum speed. | Off | |
| Maximum Speed | Speed cap in km/h. Shown only when Limit Speed is on. | 100 | |
| Smoothed Steering | Blends steering over time instead of applying it instantly. | On | |
| Lap & Waypoint Info | |||
| Stop After Lap? | Stops the AI after a number of laps (Follow Waypoints). | Off | |
| Stop Lap Index | The AI stops when Current Lap reaches this value. Shown only when Stop After Lap? is on. | 10 | |
| Detection Distances | |||
| Detector Radius | Radius in meters for finding targets and brake zones. | 200 | |
| Start Follow Distance | Not used by the current code. | 300 | |
| Stop Follow Distance | Distance in meters where Follow Target stops near its target. The braking distance grows with speed. | 30 |
The Skyline (AI Chaser) prefab ships with Raycast Length 20, Stop Lap Index 2 and Stop Follow Distance 50. All other values match the table.
Runtime read-outs (set by the AI, for debugging): Current Obstacle, the Vehicle Input (Runtime) foldout (Steer / Throttle / Brake / Handbrake Input), Current Lap, Total Waypoints Passed, Ignore Waypoint Now (on while obstacle rays override waypoint steering), and the Targets & Brake Zones foldout (Targets In Zone, Brake Zones, Chase Target, Brake Zone Target). The AI overwrites Chase Target each time it searches, so assigning it by hand has no lasting effect.
Waypoints
Waypoints are child GameObjects of the Waypoints Container, each with an RCC_Waypoint component.
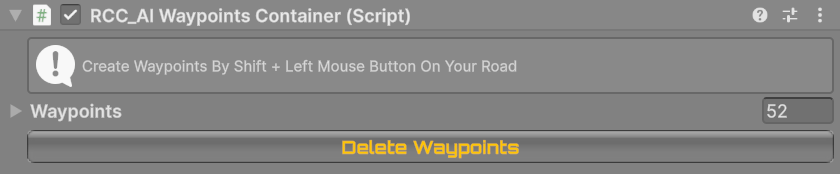
- Add: select the container, then Shift + Left Click on a collider in the Scene view. Each click adds a waypoint at the hit point (undoable).
- Order: the AI follows the children in Hierarchy order. Reorder the children to change the route.
- Plain children: any child without
RCC_Waypointgets one when the container's inspector is shown. - Delete: the container's Delete Waypoints button removes all waypoints (undoable).
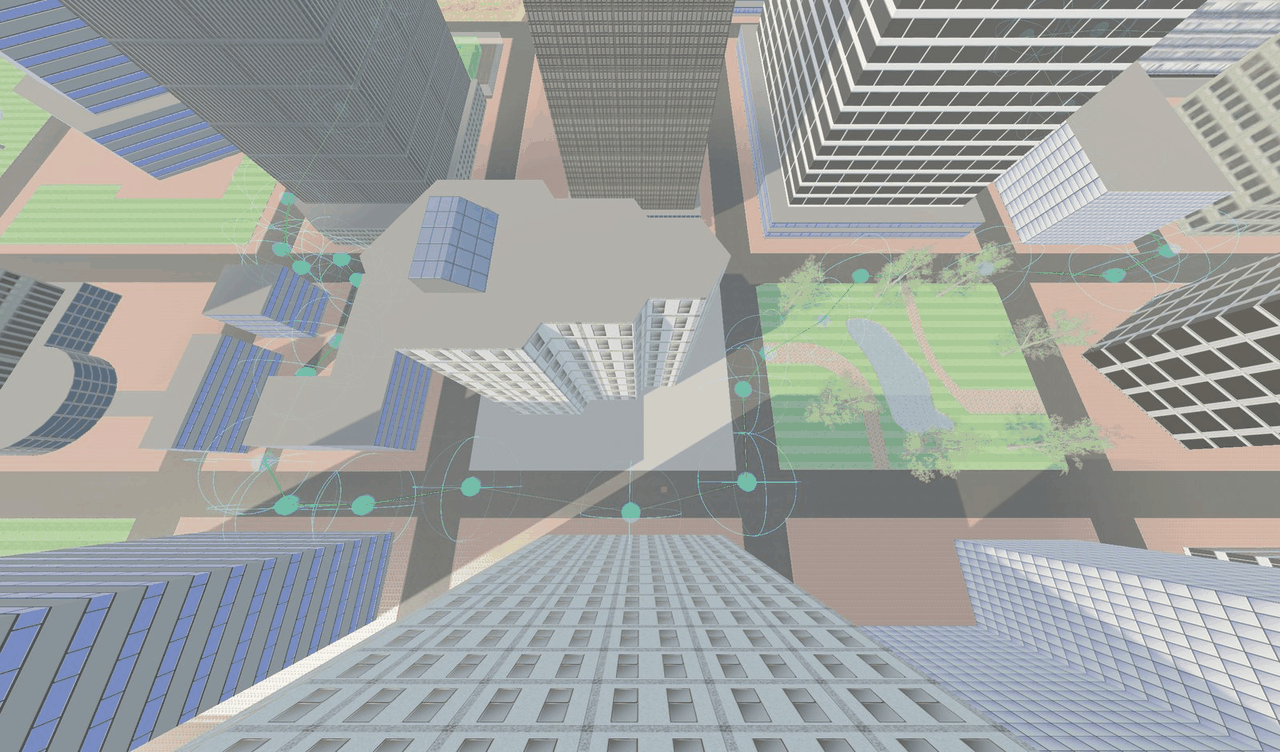
- Gizmos: each waypoint shows a sphere and its radius; green lines connect them, including a closing line from the last waypoint to the first.
| Waypoint field | What it does | Default |
|---|---|---|
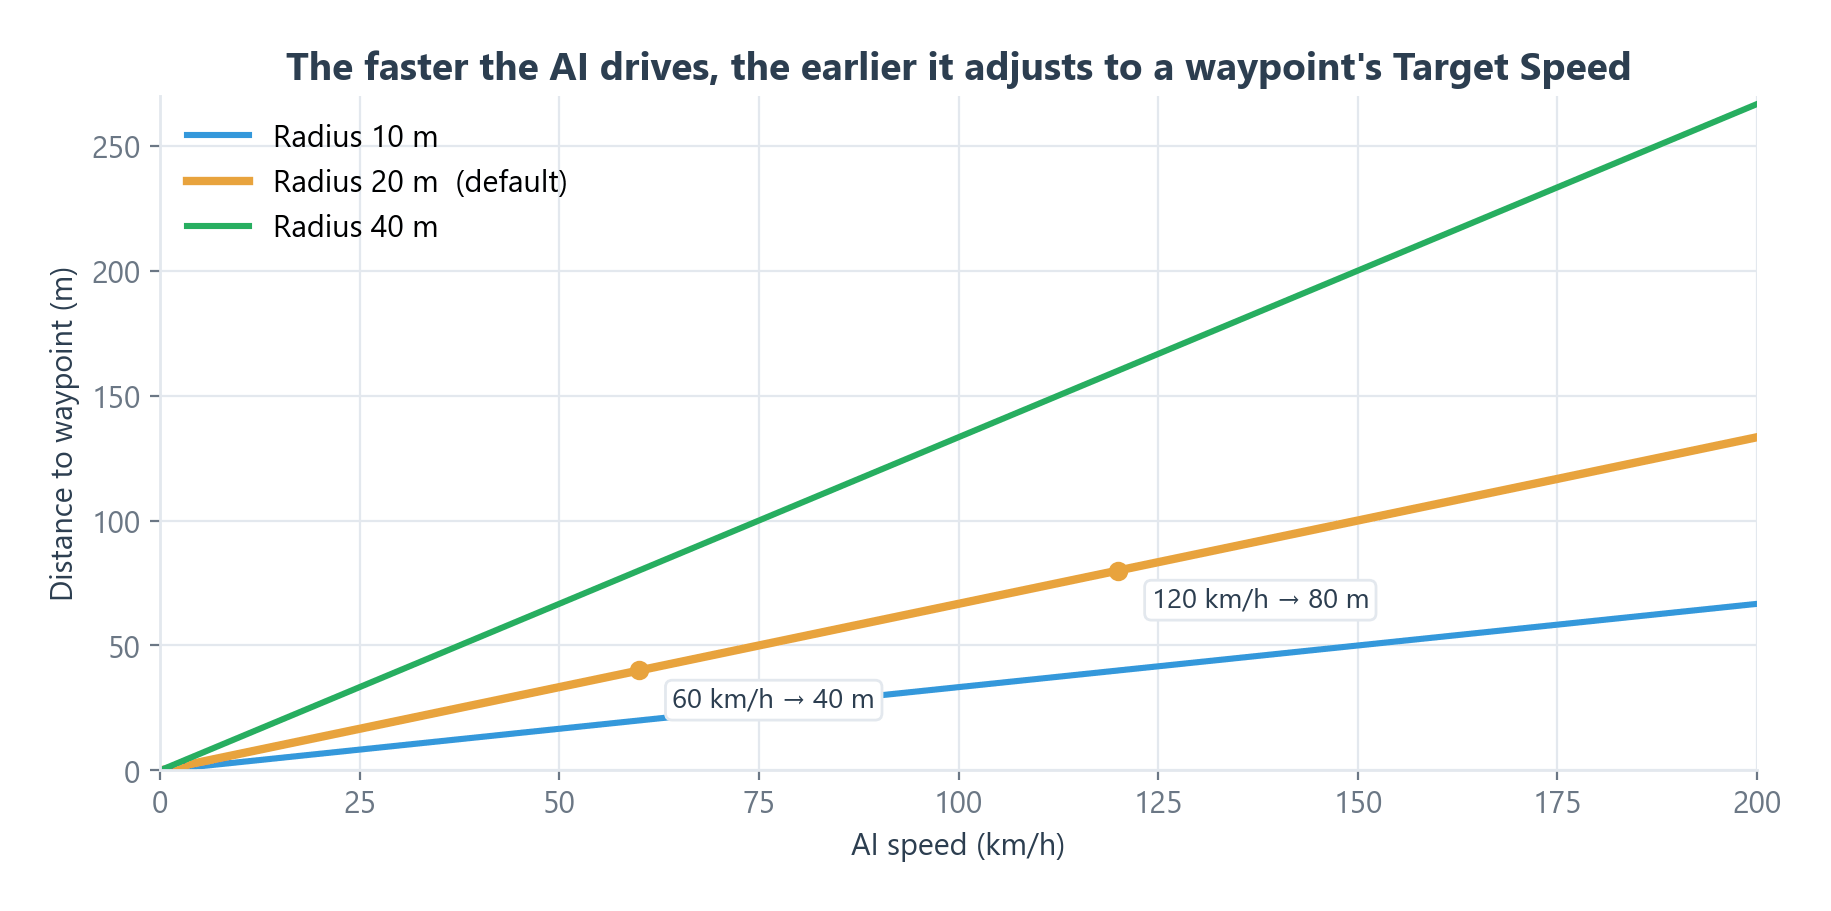
| Target Speed | Speed in km/h the AI aims for as it approaches this waypoint. It starts adjusting at Radius × (speed ÷ 30) meters away, so it brakes earlier when going faster. | 240 |
| Radius | The waypoint counts as reached within this distance in meters, and the AI moves on to the next one. | 20 |
Use lower Target Speed values on waypoints before corners.
Brake Zones
A brake zone makes AI cars brake hard when they are near a point and too fast.
- Tools → BoneCracker Games → Realistic Car Controller → AI → Add BrakeZones Container To Scene (one per scene; a second one is refused).
- With the Brake Zones Container selected, Shift + Left Click on the road to place a zone. Each zone gets
RCC_AIBrakeZone, a 1 × 1 × 1 trigger BoxCollider and the Ignore Raycast layer. - Set the zone's fields:
| Brake zone field | What it does | Default |
|---|---|---|
| Target Speed | Speed in km/h the AI must be below inside the zone. | 50 |
| Distance | Zone radius in meters, measured from the zone's position. | 100 |
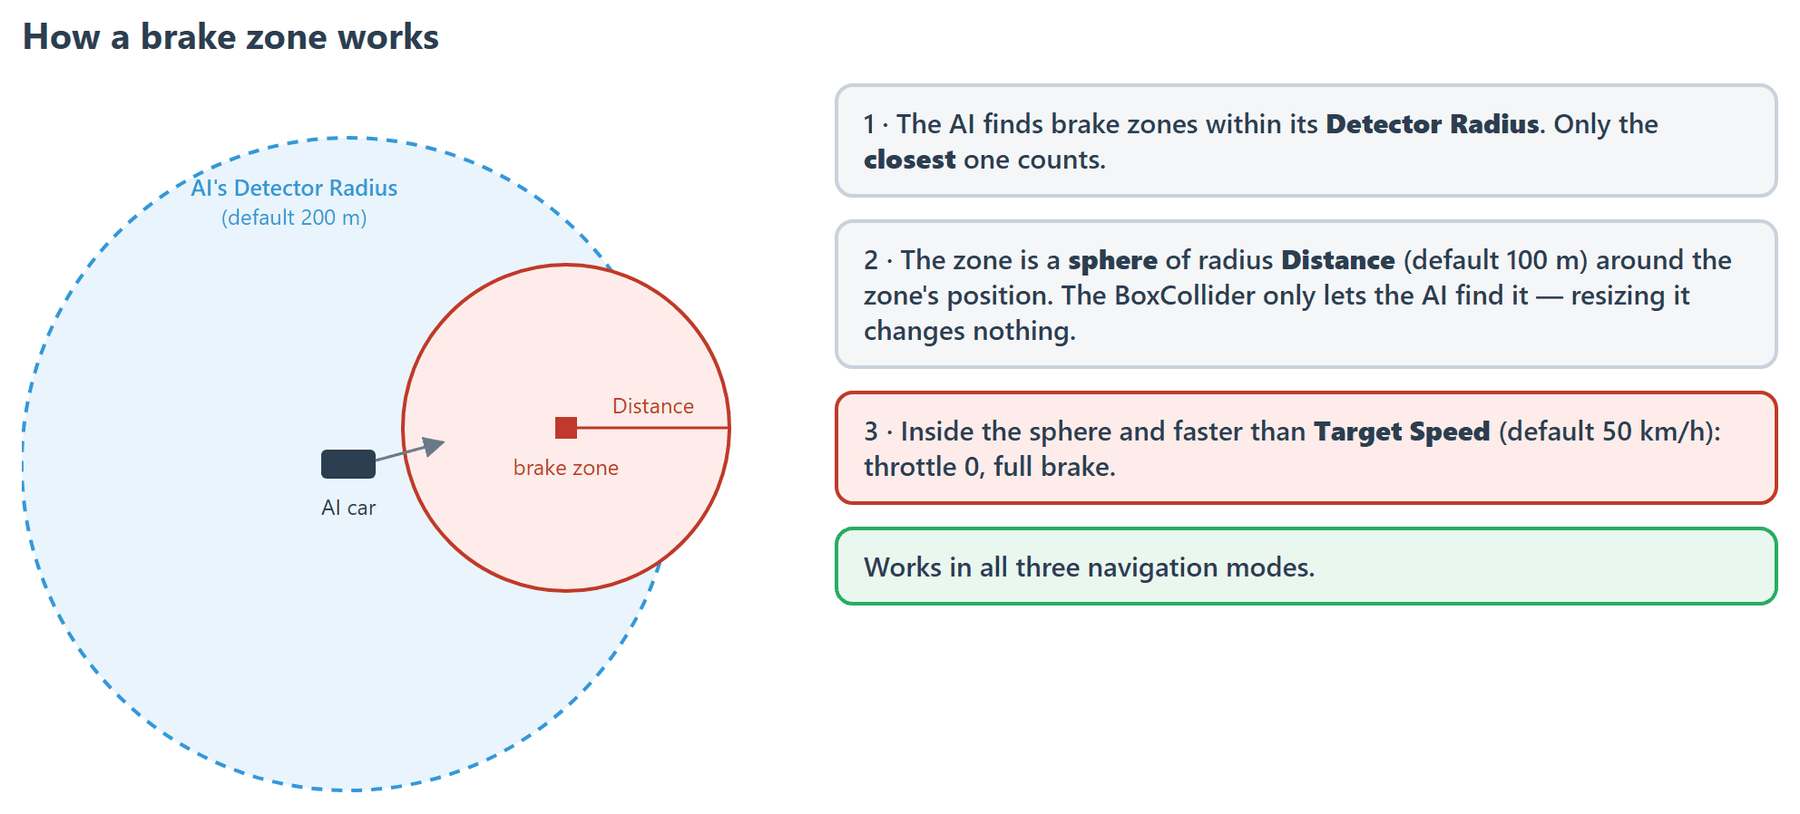
- The zone is a sphere of radius Distance. The box collider only lets the AI find the zone and draws the gizmo. Resizing it does not change the zone.
- Only the closest zone within Detector Radius counts. Inside it, above Target Speed, the AI releases the throttle and brakes fully.
- Brake zones work in all three navigation modes.
- Delete Brake Zones on the container removes all zones (undoable).
Spawning an AI Car from Code
Use a prefab that already has RCC_AICarController (for example Skyline (AI Chaser)). Pass isControllable: true, because the AI does nothing while the vehicle cannot be controlled. Pass registerAsPlayerVehicle: false so the camera and player stay on the player's car.
using UnityEngine;

public class SpawnAICar : MonoBehaviour {

    public RCC_CarControllerV4 aiVehiclePrefab;     // Prefab with RCC_AICarController.
    public RCC_AIWaypointsContainer waypoints;      // Route to follow.
    public Transform spawnPoint;

    private void Start() {

        RCC_CarControllerV4 vehicle = RCC.SpawnRCC(aiVehiclePrefab, spawnPoint.position, spawnPoint.rotation, false, true, true);

        RCC_AICarController ai = vehicle.GetComponent<RCC_AICarController>();
        ai.navigationMode = RCC_AICarController.NavigationMode.FollowWaypoints;
        ai.waypointsContainer = waypoints;

    }

}
To stop an AI car and hold it in place, disable the AI and remove control:
ai.enabled = false;                      // Hands the vehicle back from the AI.
RCC.SetControl(ai.CarController, false); // No input: throttle 0, handbrake on.
Disable the AI first. If you only remove control, the vehicle keeps the AI's last inputs.
AI and the Player Vehicle
- AI vehicles are never registered as the player vehicle automatically. Register Last Spawned Vehicle As Player Vehicle on the Scene Manager ignores them.
- To point the camera at an AI car, call
RCC.RegisterPlayerVehicle(aiVehicle). The AI keeps driving.
Changed in V6: registering a new player vehicle takes control away from the previous one, but vehicles driven by an external controller (AI, replay, network) are never released. Registering an AI car does not take control from the current player car, and registering a player car does not stop an AI car.
- A plain
OverrideInputs(inputs)does not take over from the AI. See Overriding Inputs for the precedence rules. RCC_Events.OnRCCAISpawned/OnRCCAIDestroyedfire when an AI controller is enabled or disabled. See Events System.