How to Create New Vehicles
This page shows how to turn your own 3D car model into a drivable RCC vehicle. You can use the Quick Vehicle Setup Wizard (Path A) or set it up by hand (Path B). Lights, exhaust, first tuning steps and common problems come after that.
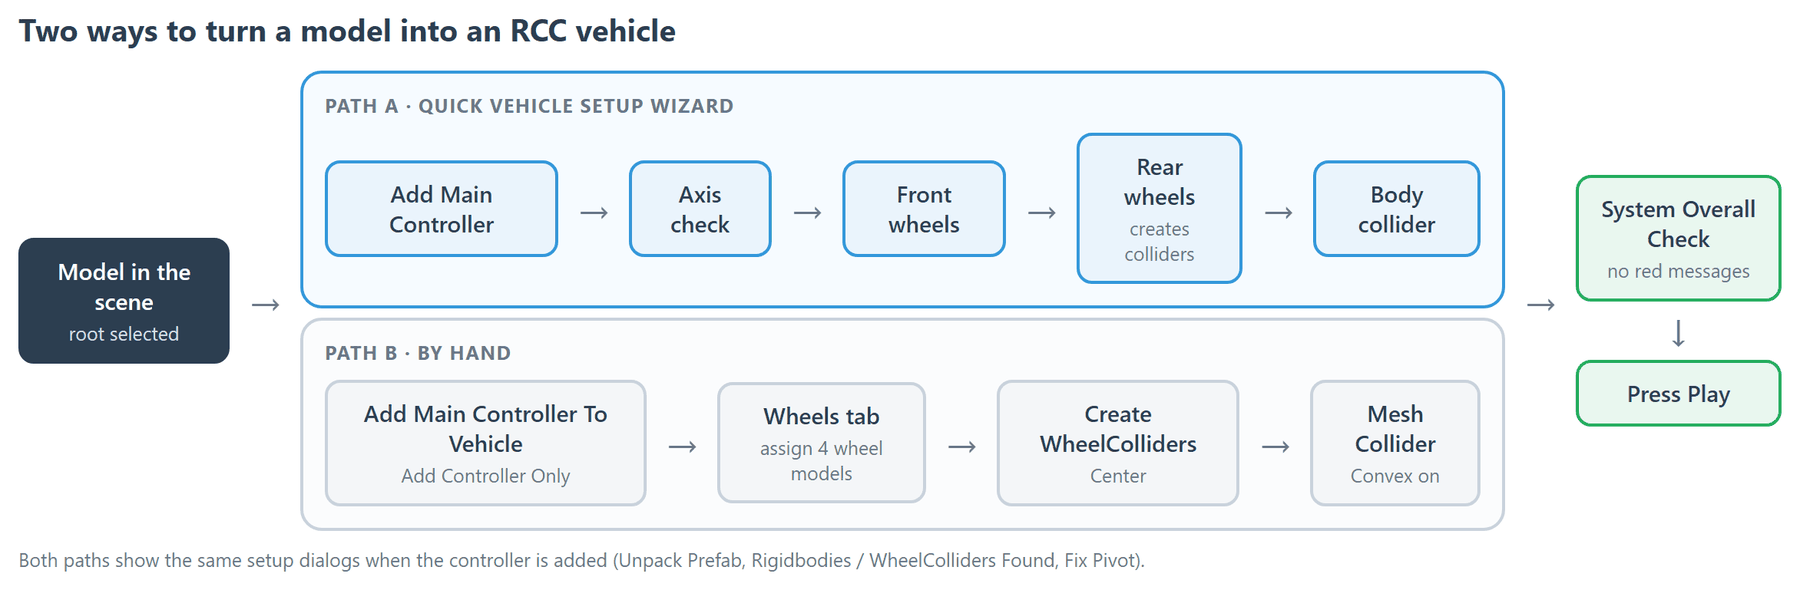
Model Requirements
| Requirement | Why |
|---|---|
| Each wheel is its own GameObject with a mesh renderer, not part of the body mesh. | RCC sizes each WheelCollider from the wheel's renderer bounds. An empty GameObject gives a 0 radius. Try Detect can't find wheels that are merged into the body. |
| Front of the car faces +Z (blue arrow), up is +Y. | The vehicle drives along its +Z axis. Try Detect uses +Z to tell front from rear and +X to tell right from left. The wizard's axis check fails if the model isn't longest along Z. |
| Real-world size (1 unit = 1 m). | RCC's default mass (1370 kg) and suspension values are for a real-size car. |
| No extra Rigidbodies or WheelColliders on the model. | They change how the car drives. Setup offers to remove them. |
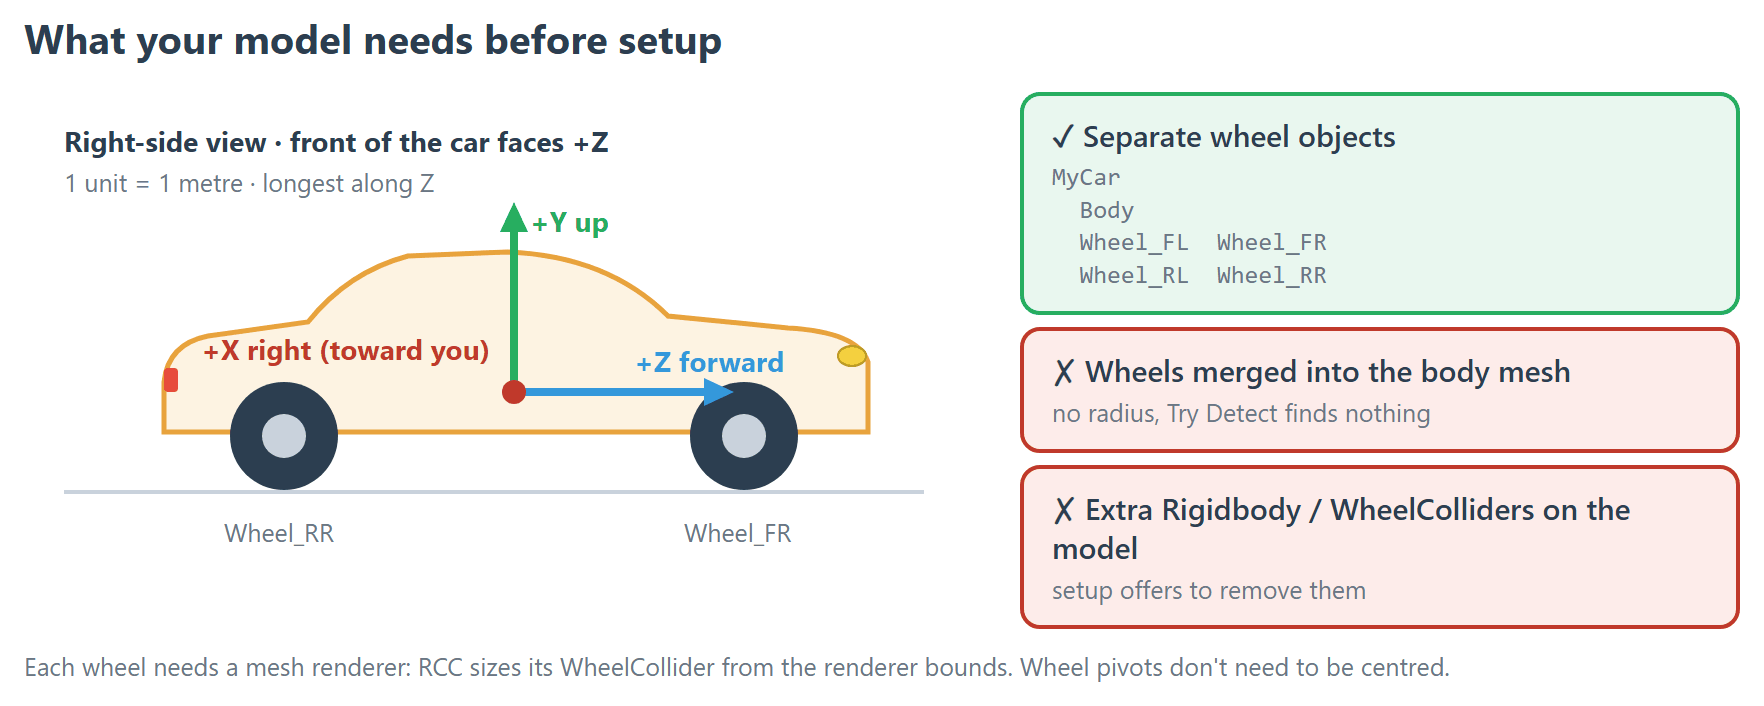
The wheel pivots don't need to be centred. At runtime, RCC creates a pivot at the centre of each wheel's bounds.
Path A: Quick Vehicle Setup Wizard
- Drag your model into the scene and select its root in the Hierarchy.
- Open Tools → BoneCracker Games → Realistic Car Controller → Quick Vehicle Setup Wizard. The menu item works only when exactly one active GameObject is selected in the scene.
-
Welcome page: click Next.
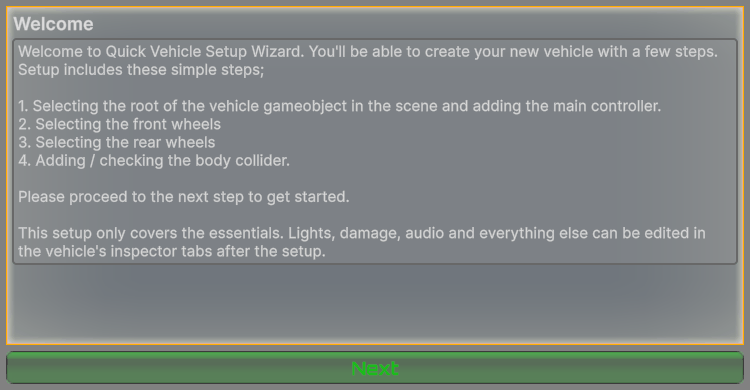
The wizard's Welcome page. The green button at the bottom moves to the next page. -
Add Main Controller page: keep the vehicle root selected. Its name appears under This GameObject Is Root Of My Vehicle. Click Yes, I've Selected The Root Of The GameObject, Next, then answer the setup dialogs.
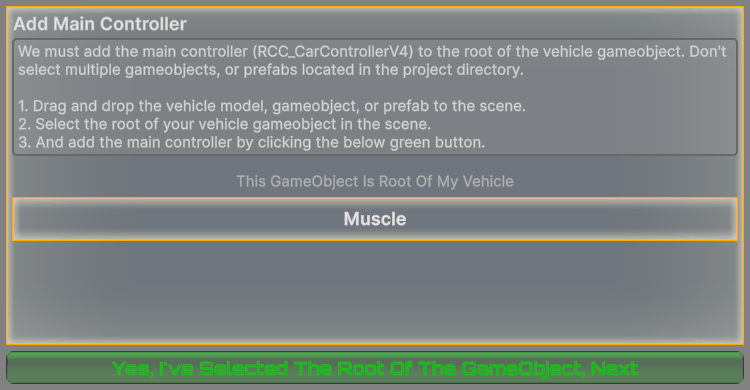
Add Main Controller page: the name of the selected object appears under This GameObject Is Root Of My Vehicle. -
Customize Controller page: this page checks the axes. If the wrong X Y Z axis orientation error appears, fix the model first (see Model Requirements). Then click Next.
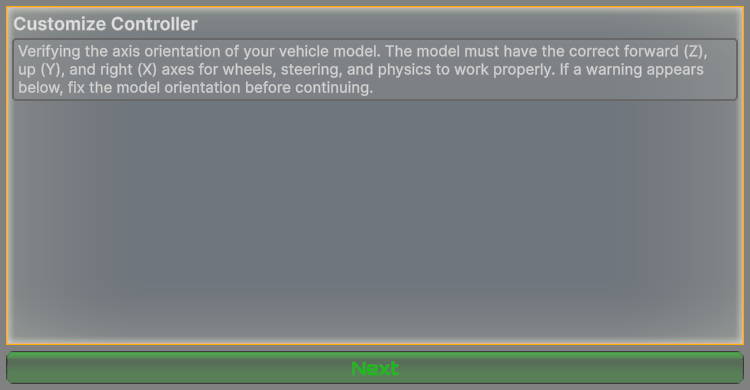
Customize Controller page with a correctly oriented model: no axis error. -
Front Wheels page: drag the wheel objects into Front Left Wheel and Front Right Wheel. You can also click Try Detect Front Wheels, click Select:
for each real wheel (pick the parent wheel objects, not their children), then click Save & Close. Left and right are assigned from each wheel's position. Click Yes, I've Selected Front Left And Right Wheels, Next. 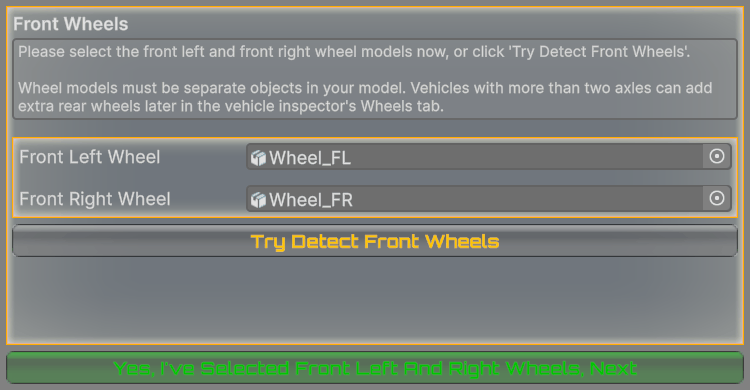
Front Wheels page with both wheel objects assigned. -
Rear Wheels page: do the same with Rear Left Wheel, Rear Right Wheel and Try Detect Rear Wheels. Clicking Yes, I've Selected Rear Left And Right Wheels, Next creates a Wheel Colliders child with one WheelCollider per wheel. Ctrl+Z undoes this step.
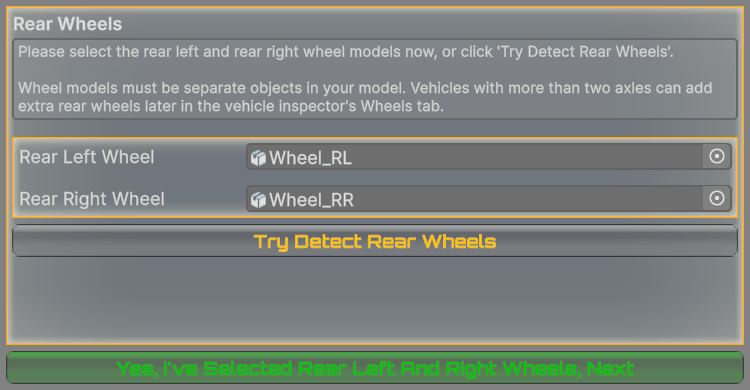
Rear Wheels page. Clicking the green button here also creates the WheelColliders. -
Body Collider page: drag the main body mesh into Main Body and click Add MeshCollider To Selected Body. This adds a convex MeshCollider that uses the collider material from RCC Settings. Click Yes, I've Added A Body Collider, Next.
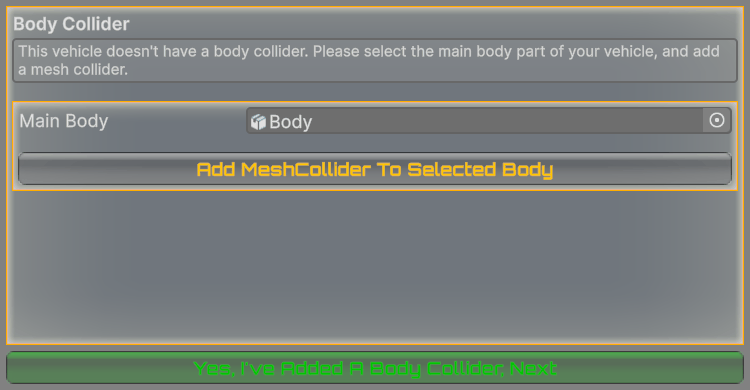
Body Collider page: assign the body mesh, then click Add MeshCollider To Selected Body. -
Congratulations! page: click Thanks, See You Next Time... to close the wizard.
- Select the vehicle and check System Overall Check at the bottom of its Inspector (see Check the Vehicle).
- Press Play and drive.
The wizard supports four wheels. For extra rear axles, follow steps 3–4 of Path B afterwards and choose Delete Existing And Create New.
Setup Dialogs
These dialogs appear when the controller is added, either from the wizard or from Add Controller Only. One Ctrl+Z undoes the whole step.
| Dialog | When it appears | Recommended choice |
|---|---|---|
| Unpack Prefab | The model is a prefab instance. | Unpack. Otherwise you can't move, reorder or delete its children. |
| Rigidbodies Found | The model already has a Rigidbody. | Remove Them |
| WheelColliders Found | The model already has WheelColliders. | Remove Them |
| Fix Pivot Position Of The Vehicle | Always. | Fix creates a new parent with the same name at the centre of the model's bounds and puts the controller on it. No puts the controller on the selected object. |
The Rigidbody gets the values from RCC_InitialSettings: mass 1370, linear damping 0.0025, angular damping 0.35. To change them for future vehicles, open Tools → BoneCracker Games → Realistic Car Controller → Configure → Configure Initial Vehicle Setup Settings.
Path B: Manual Setup
- Drag your model into the scene and select its root. Open Tools → BoneCracker Games → Realistic Car Controller → Add Main Controller To Vehicle and click Add Controller Only. The setup dialogs appear. Open Wizard starts Path A instead.
-
In the vehicle Inspector, click the first category icon (Wheels). Assign Front Left Wheel Model, Front Right Wheel Model, Rear Left Wheel Model and Rear Right Wheel Model.
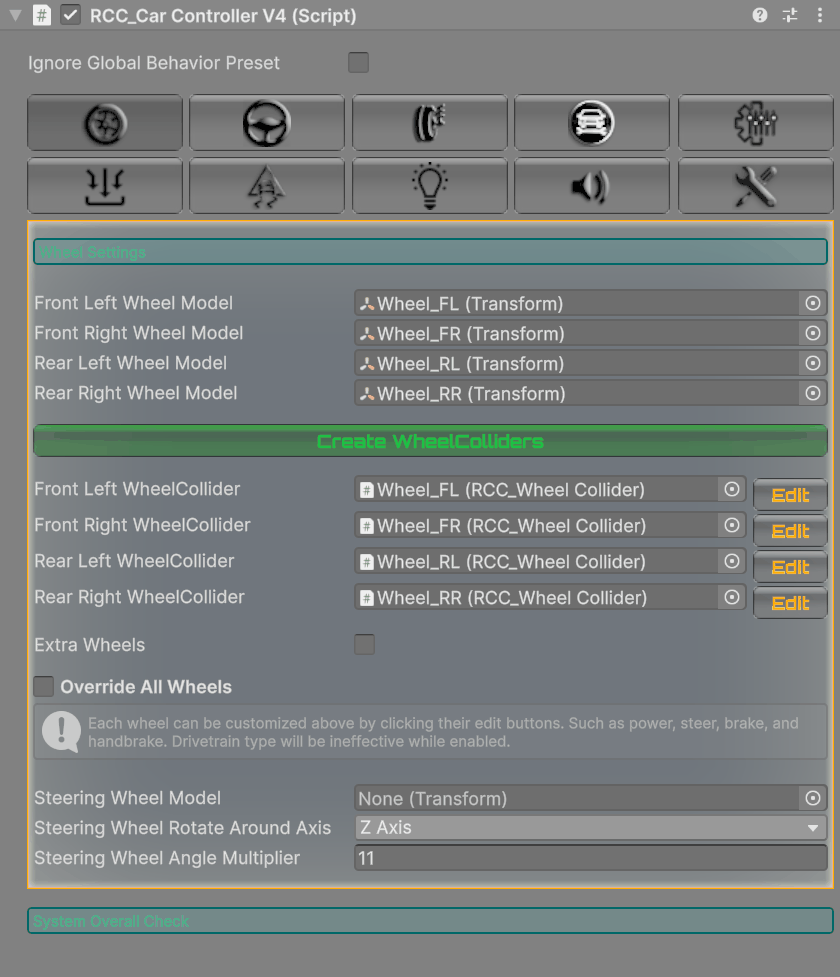
The Wheels tab: the four wheel model fields and the Create WheelColliders button. -
Trucks and other vehicles with more than two axles: turn on Extra Wheels and fill Extra Rear Wheel Models. Don't leave any empty slots.
- Click Create WheelColliders. The button is enabled only after all four wheel models are assigned. - If the vehicle already has WheelColliders, choose Delete Existing And Create New. - When asked where to put them, choose Center. This is the same placement the wizard uses. - The WheelColliders go under a Wheel Colliders child, and the WheelCollider fields fill in automatically. Ctrl+Z undoes the whole step.
- Select the main body mesh, click Add Component → Mesh Collider and turn on Convex.
- Select the vehicle root and check System Overall Check (see below). Then press Play.
Warning: Adding
RCC_CarControllerV4through Add Component, or choosing Reset on it, deletes any children named COM and Wheel Colliders. Add the controller first, then create the WheelColliders.Changed in V6: Add Main Controller To Vehicle now asks Open Wizard / Cancel / Add Controller Only, and Create WheelColliders can be undone.
Check the Vehicle
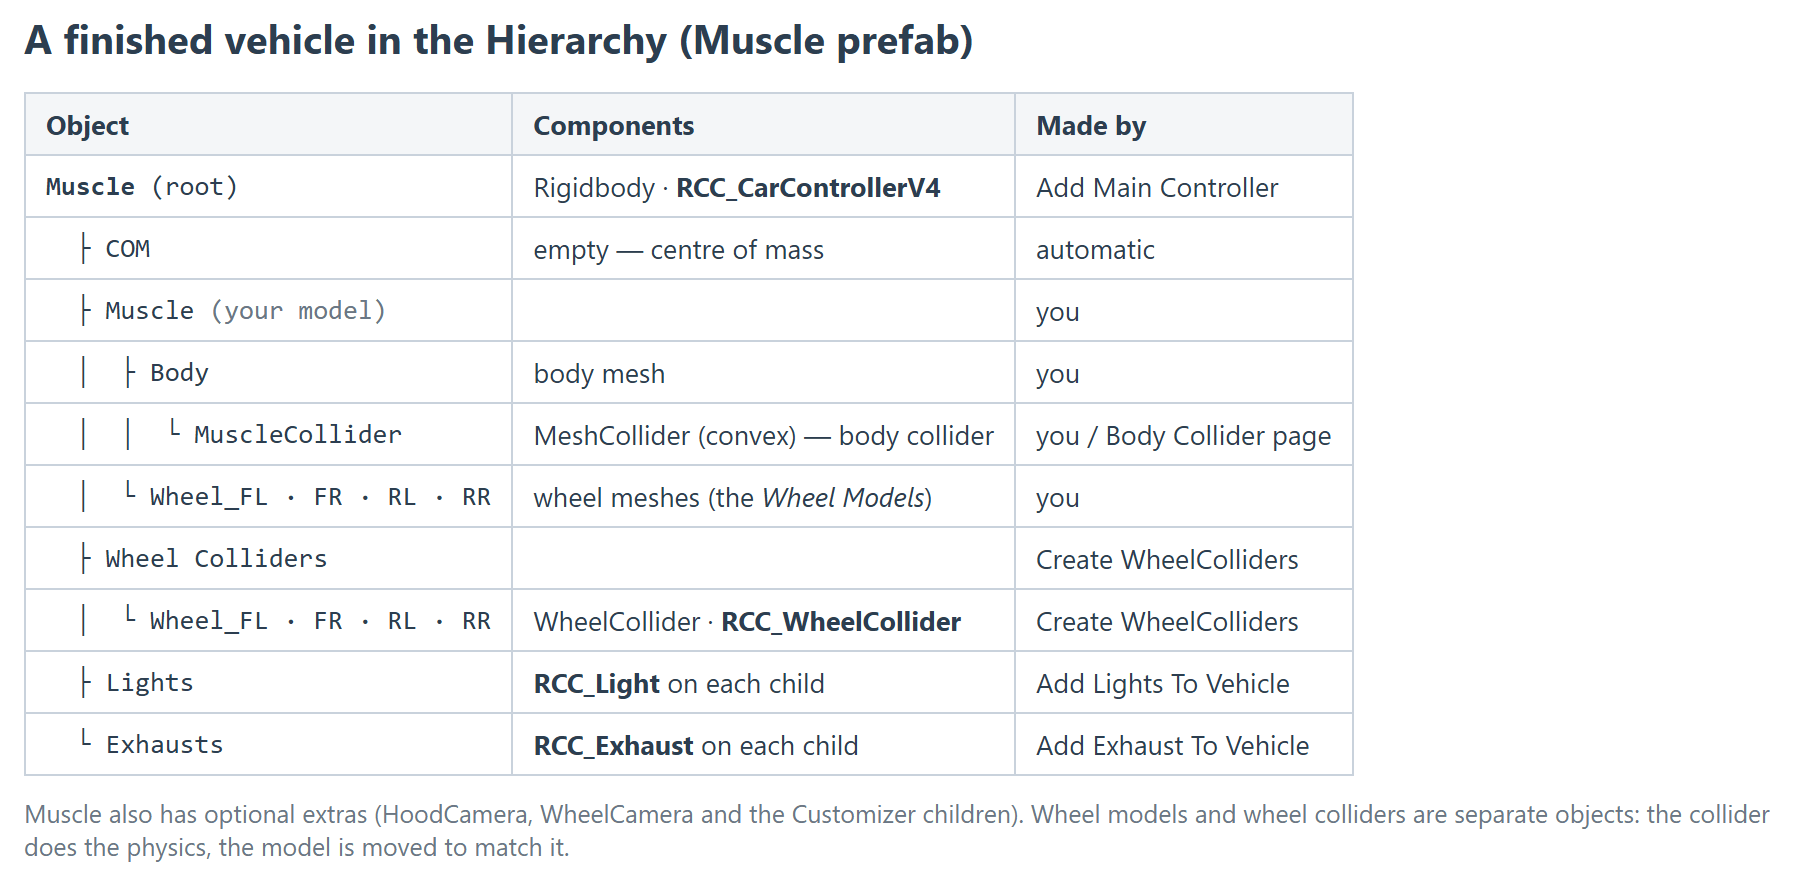
The vehicle Inspector checks your setup every time it's drawn:
- COM (centre of mass): If the vehicle has no COM child, RCC creates one. If the COM sits at height 0, RCC places it automatically from the vehicle's bounds and shows a warning. Move the COM object lower if the car rolls over too easily.
- System Overall Check errors to clear: Wheel Colliders = NOT OK, Your vehicle MUST have at least four wheel colliders., Wheel Models = NOT OK, COM = NOT OK, Your vehicle MUST have any type of body collider., This mesh collider is not convex enabled, and 0 radius WheelColliders (the wheel model has no renderer).
- Scene checks: If the scene has no RCC Camera, click Add RCC Camera. If Mobile Controller is on in RCC Settings but the scene has no RCC Canvas with mobile buttons, click Add RCC Canvas.
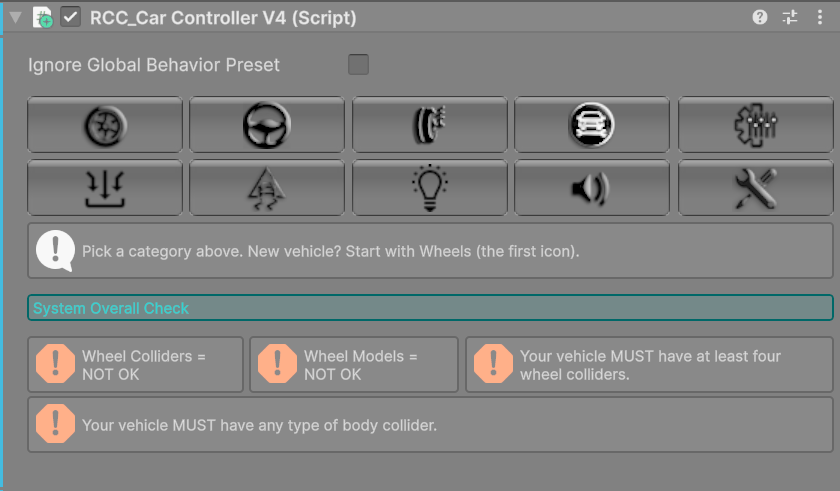
New in V6: The category icons show tooltips (Wheels, Steering, Suspension, Engine & Gears, Customizer, Inputs, Stability, Lights, Sounds, Damage). The camera and canvas scene checks, with their fix buttons, are also new.
You don't need a Player tag. By default, the RCC Scene Manager registers the last spawned non-AI vehicle as the player vehicle, including a vehicle placed in the scene. See Quick Start.
Lights
- Select the vehicle or any of its children.
- Open Tools → BoneCracker Games → Realistic Car Controller → Create → Lights → Add Lights To Vehicle and choose HeadLight, Brake, Reverse, Indicator or Interior. The light is created under a Lights child and selected. - Or open the Lights tab in the vehicle Inspector and click + Head Light, + Brake Light, + Reverse Light or + Indicator Light.
- Move the light into place.
- To make the matching light on the other side, open Tools → BoneCracker Games → Realistic Car Controller → Create → Lights → Duplicate Selected Light. The copy is mirrored on X.
Indicators work out which side they're on from their position. For light settings, see Lights System.
Exhaust
- Select the vehicle.
- Open Tools → BoneCracker Games → Realistic Car Controller → Create → Misc → Add Exhaust To Vehicle. The exhaust prefab from RCC Settings is created under an Exhausts child.
- Move it to the tailpipe. Duplicate it (Ctrl+D) for a second pipe.
RCC_Exhaust uses the Particle System on its own GameObject. Don't add it to an empty object.
First Tuning
Save the vehicle as a prefab first. To do that, drag its root from the Hierarchy into the Project window.
- Engine & Gears tab: set Maximum Engine Torque, Maximum Brake Torque, Final Drive Ratio and Wheel Type Choise (FWD, RWD, AWD or BIASED). Click one of the 1 Gear Preset … 8 Gears Preset buttons to rebuild the gear table.
- Suspension tab: adjust the springs and dampers under Front Axle and Rear Axle.
- If some fields are red, the global behavior preset in RCC Settings overrides them. To tune them on this vehicle, turn on Ignore Global Behavior Preset at the top of the Inspector.
For every field, see Vehicle Inspector Reference. For grip and suspension, see How WheelColliders Work. For presets, see Behavior Presets.
Common Problems
- Wizard or Add Main Controller menu is greyed out: select exactly one active GameObject in the scene, not an asset in the Project window.
- "Couldn't find any possible wheel models": the wheels are part of the body mesh, or they don't look like wheels to the detector. Split the wheels into separate objects, or drag them into the fields by hand.
-
Axis error on the Customize Controller page: the model isn't longest along Z. Re-export it with Z forward and Y up.
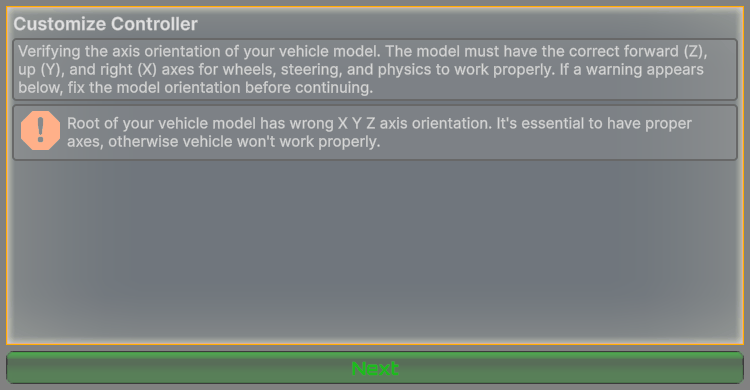
The wrong X Y Z axis orientation error on the Customize Controller page. -
"Already Has RCC_CarControllerV4": the selected object or one of its parents already has the controller.
- Wheels sink into the ground or float: click Create WheelColliders again, choose Delete Existing And Create New, then choose Center.
- Car drives backwards or steers with the rear wheels: the model faces −Z, or the front and rear wheels were swapped.
- Meshes with wrong axes found: open the Damage tab. With Auto Install off, click Fix Axis next to each mesh marked Axis is wrong!. See Damage System.
For more fixes, see Troubleshooting.