Mobile Setup
This page covers RCC's touch controls for Android and iOS: the canvas that holds them, the four controller types, their settings, and the V6 platform sync.
Quick Start
- Switch the build platform to Android or iOS. RCC turns Mobile Controller Enabled on for you (see Platform Switching & Warnings).
- Add the canvas: Tools → BoneCracker Games → Realistic Car Controller → Create → UI → Add RCC Canvas To Scene.
- Open Tools → BoneCracker Games → Realistic Car Controller → Edit RCC Settings, expand Controller Settings, and pick a Mobile Controller Type.
- Press Play. The touch controls work with the mouse in the Editor.
- Build.
While Mobile Controller Enabled is on, RCC takes throttle, brake, steering, handbrake and NOS from the touch controls only. Keyboard and gamepad input for these is ignored on every platform, including the Editor. Button actions such as lights, gear shifting and camera change still respond to keyboard and gamepad.
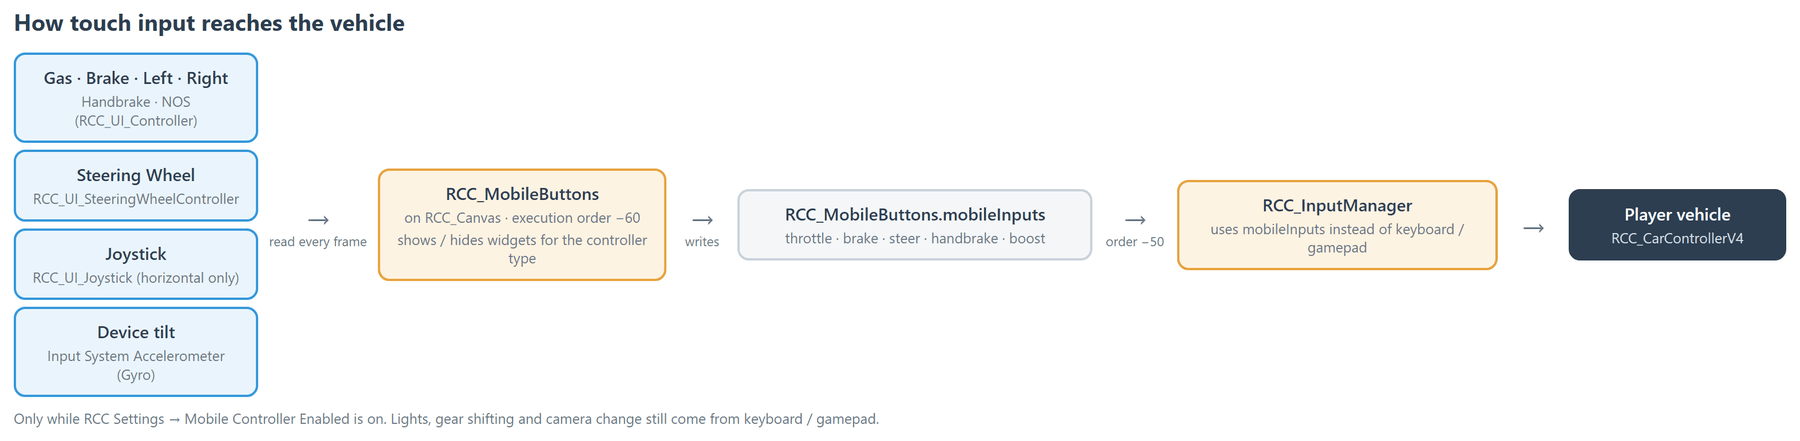
The mobile controls are in Prefabs/UI/RCC_Canvas.prefab. RCC_Canvas (AIO).prefab is the demo launcher menu. It has no touch controls.
Controller Types
| Mobile Controller Type | What the player sees | Notes |
|---|---|---|
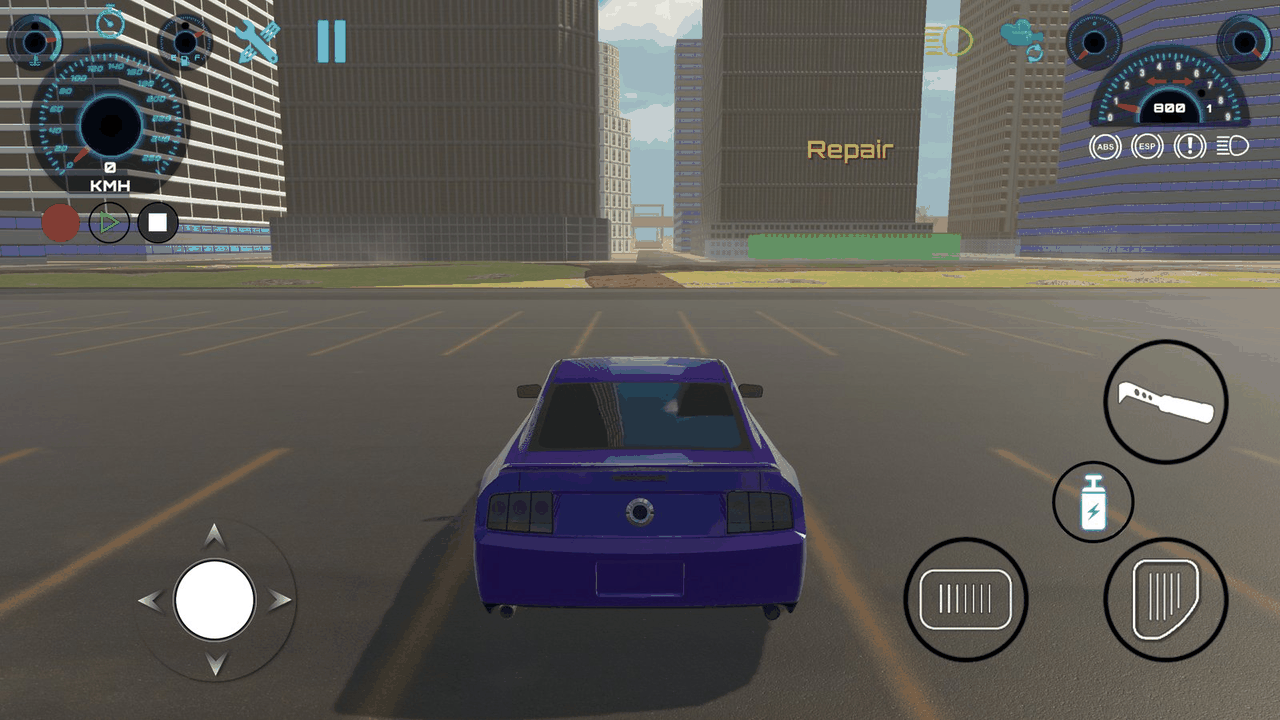
| Touch Screen | Gas, Brake, Left, Right, Handbrake, NOS | Left / Right ramp up and down like the pedals (see Button Sensitivity / Gravity). |
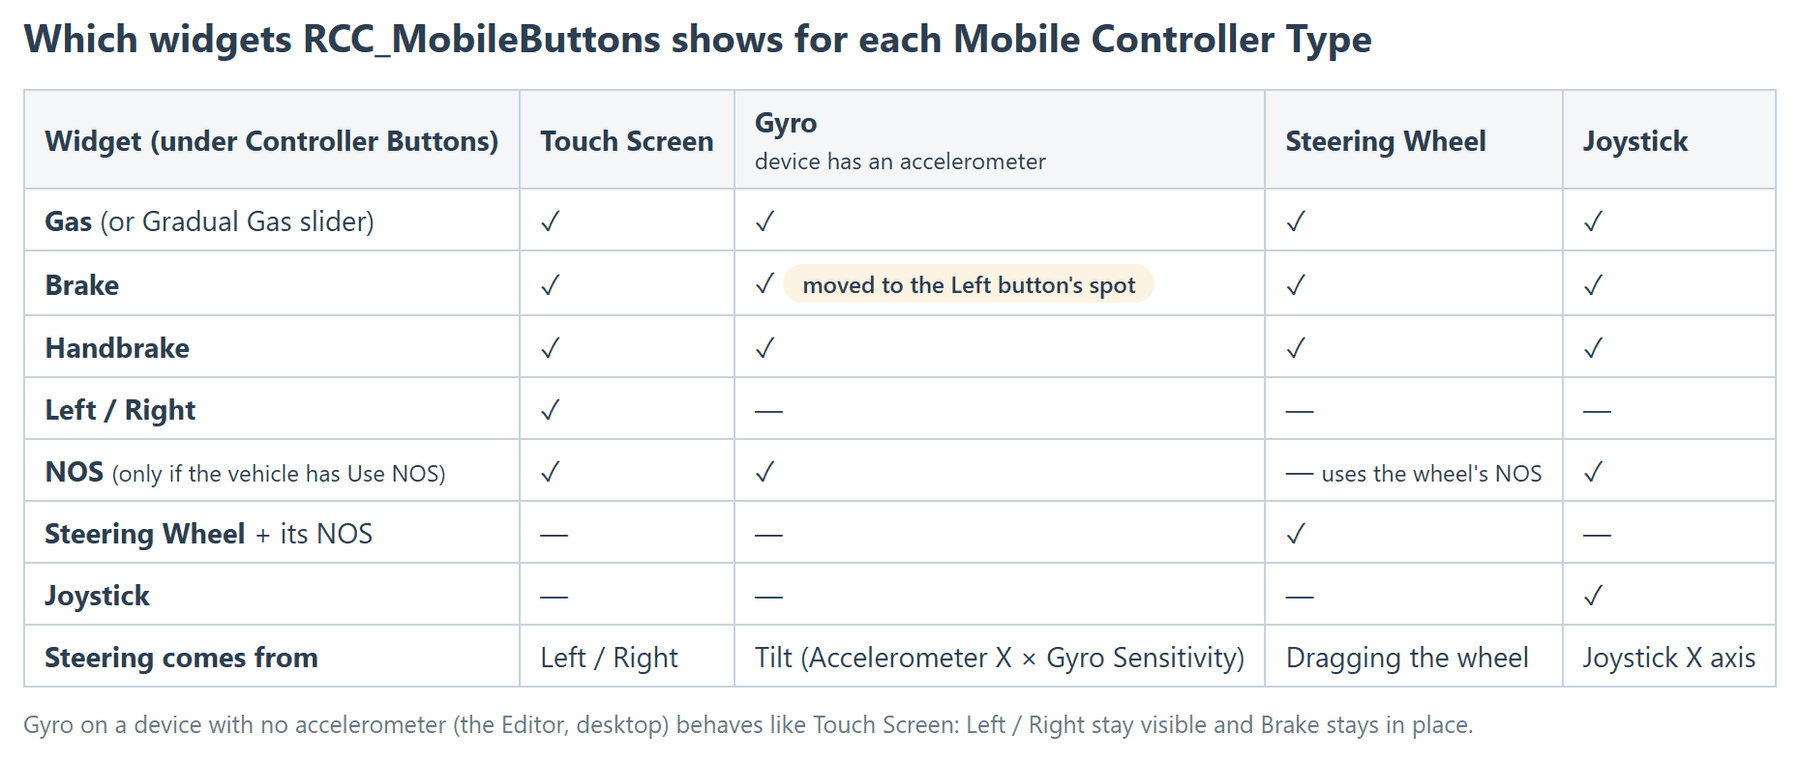
| Gyro | Gas, Brake, Handbrake, NOS. The player tilts the device to steer | Steering = Input System Accelerometer X axis × Mobile Gyro Sensitivity, smoothed. The Brake button moves to the Left button's spot. Devices with no accelerometer (the Editor, desktop) keep the Left / Right buttons and the Brake button in place. RCC has no tilt calibration and no tilt dead zone. |
| Steering Wheel | On-screen wheel, Gas, Brake, Handbrake, NOS button on the wheel | The player drags around the wheel to turn it. It re-centers on release. |
| Joystick | Joystick, Gas, Brake, Handbrake, NOS | The joystick only steers (horizontal axis). Throttle and brake stay on their buttons. |
The NOS button appears only when the player vehicle has Use NOS enabled.
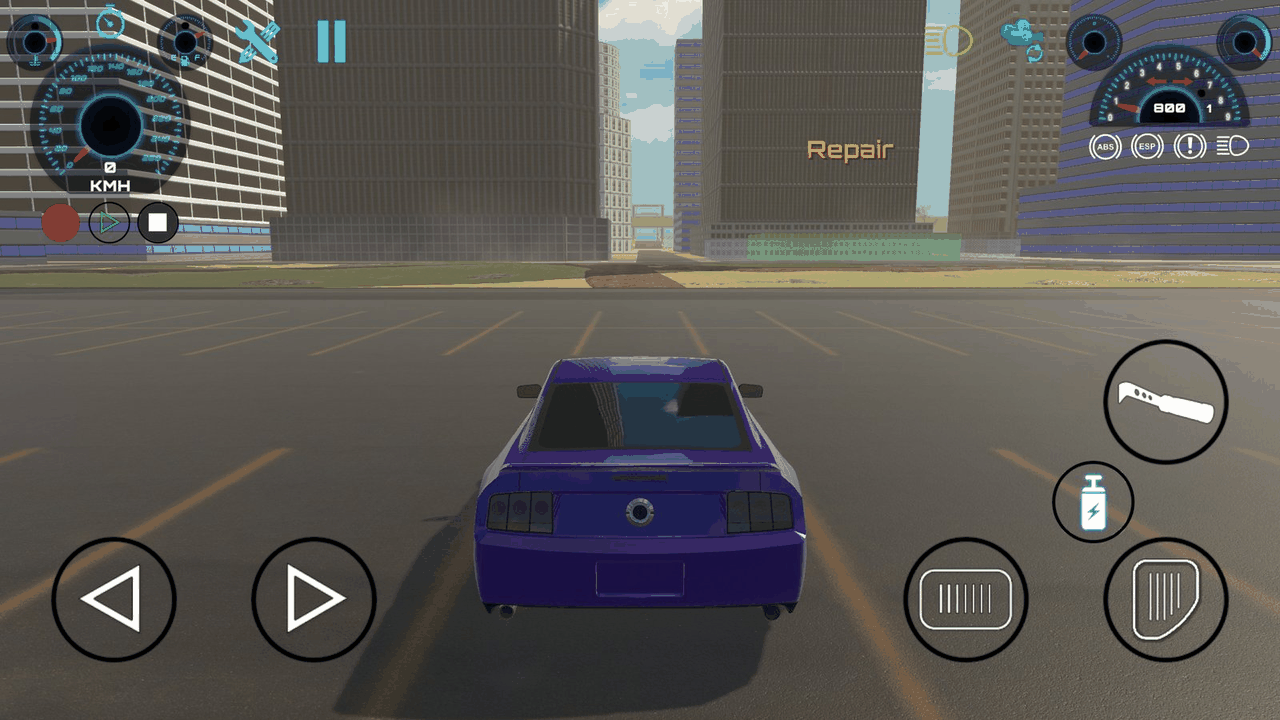
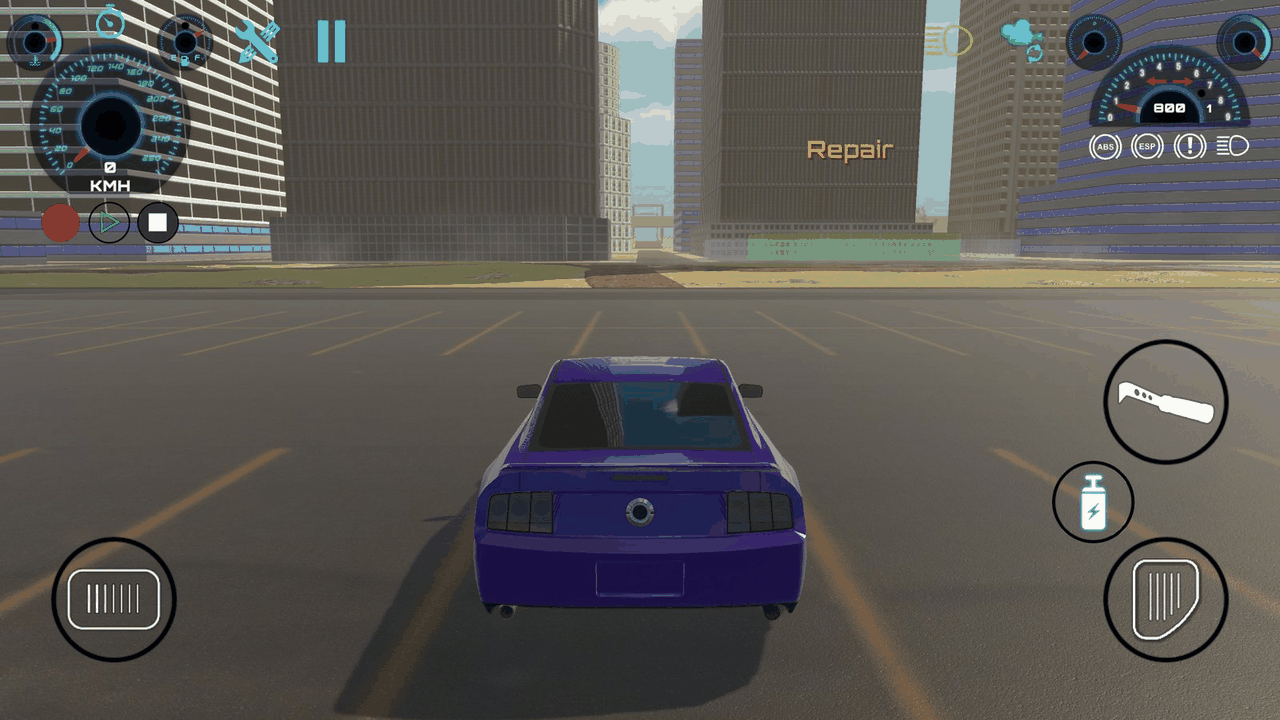
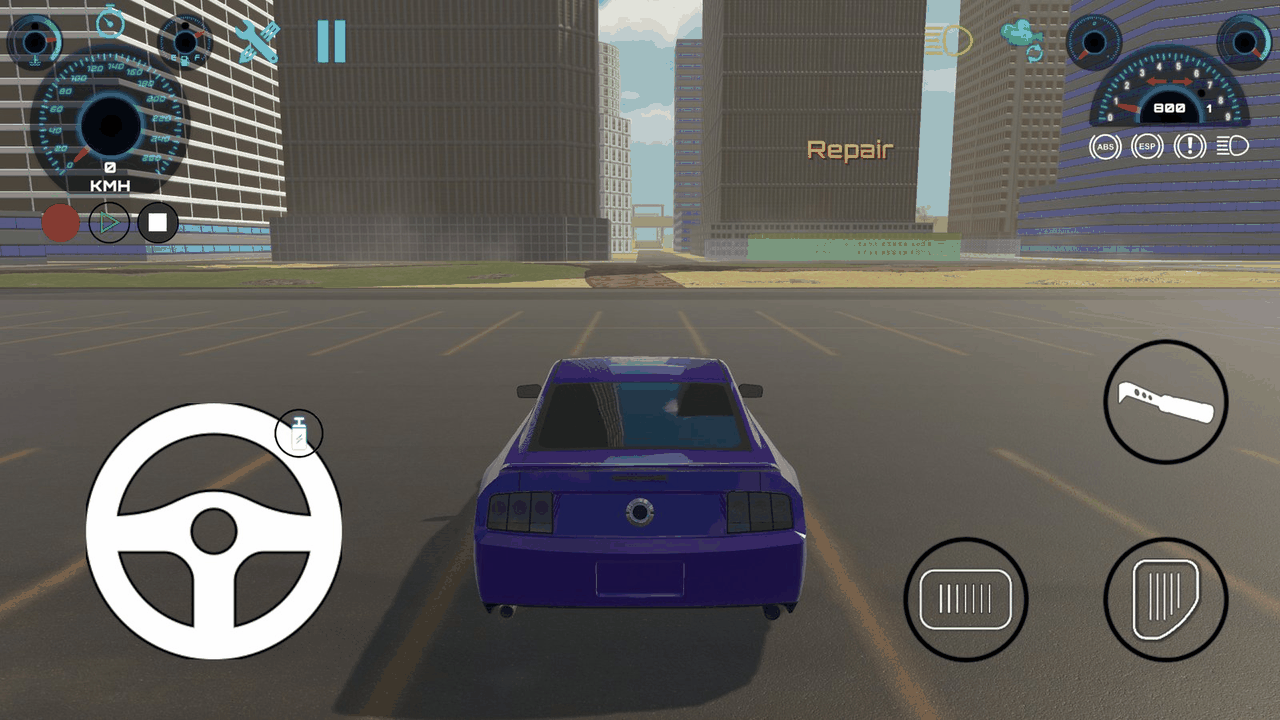
To change the type or turn mobile controls on or off at runtime (for example, from an options menu):
using UnityEngine;

public class MobileOptions : MonoBehaviour {

    public void UseJoystick() {

        RCC.SetMobileController(RCC_Settings.MobileController.Joystick);

    }

    public void SetTouchControls(bool enabled) {

        RCC_Settings.Instance.mobileControllerEnabled = enabled;

    }

}
In Play mode, RCC_Settings.Instance is a copy of the settings asset, so these changes last only for the current session. The asset on disk is not changed.
Changed in V6: turning
mobileControllerEnabledon or off at runtime now shows or hides the touch UI immediately.
Settings
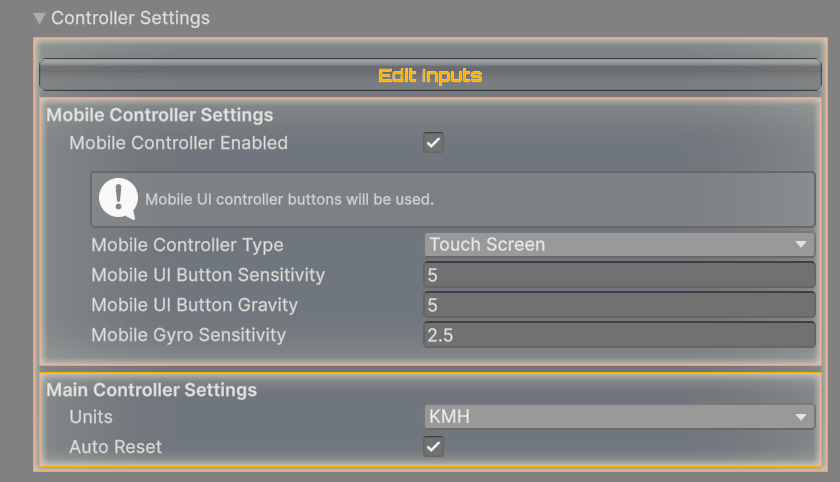
Edit RCC Settings → Controller Settings → Mobile Controller Settings. Fields below the first one are visible only while Mobile Controller Enabled is on.
| Inspector label | What it does | Shipped default |
|---|---|---|
| Mobile Controller Enabled | Shows the touch controls and reads driving input from them instead of keyboard / gamepad. | Off (turned on when you switch to Android / iOS) |
| Mobile Controller Type | Touch Screen, Gyro, Steering Wheel or Joystick. | Touch Screen |
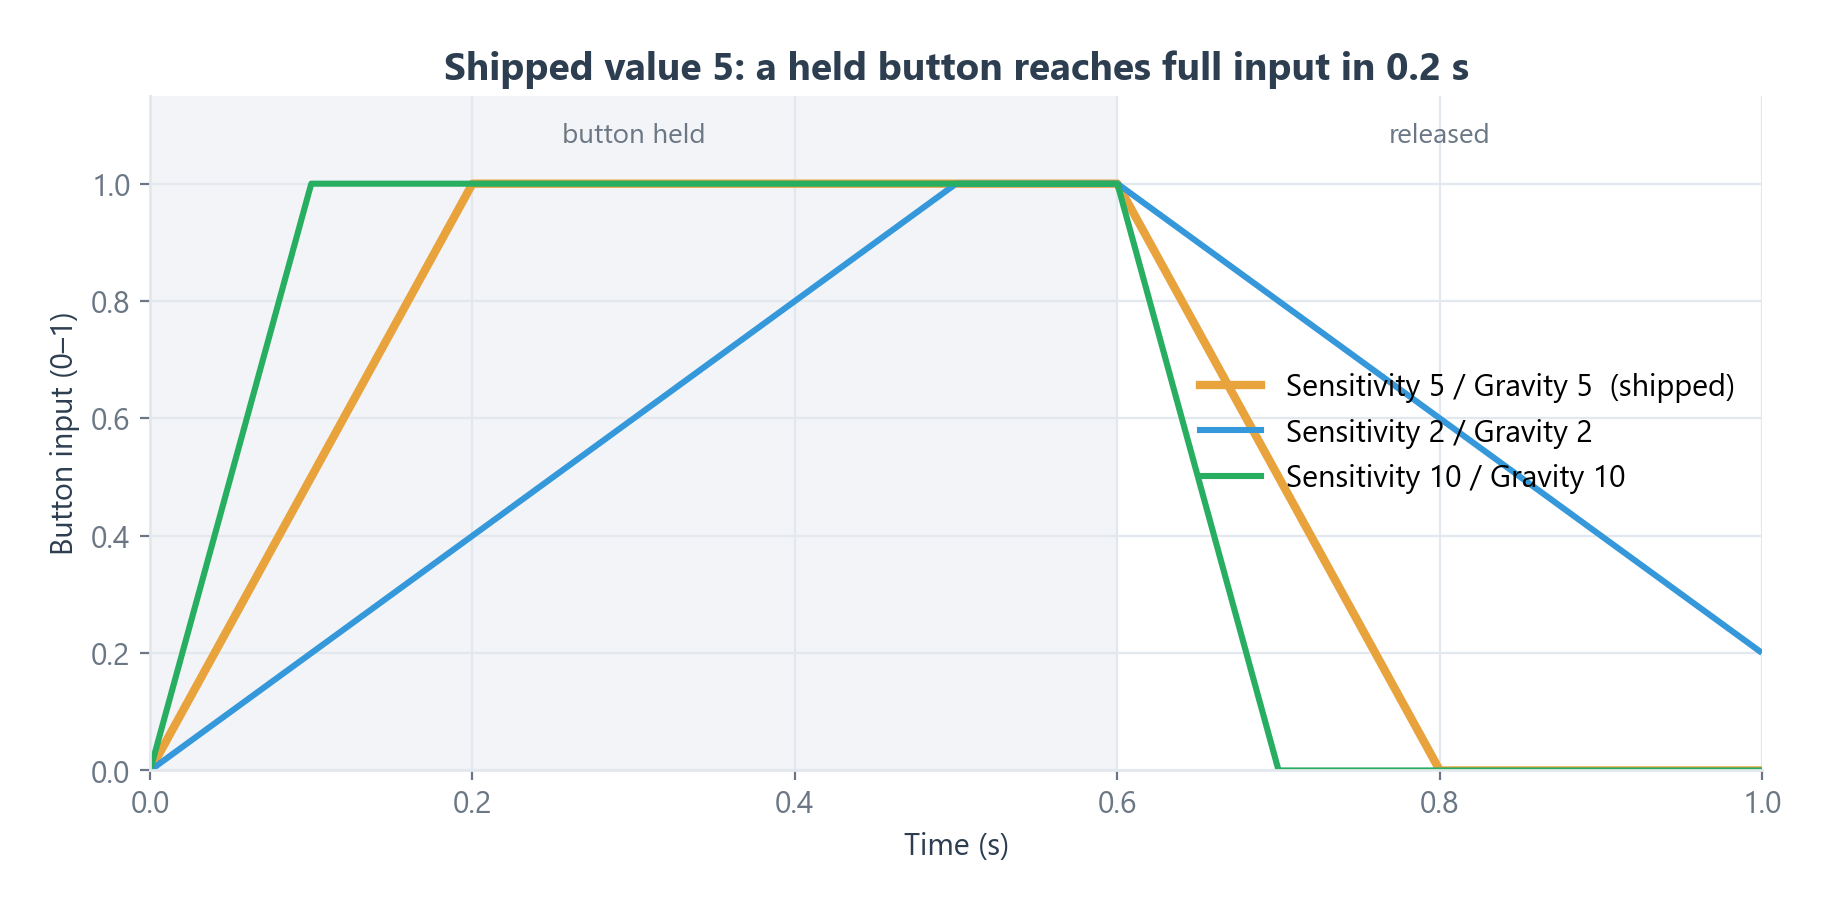
| Mobile UI Button Sensitivity | How fast a held button's input rises to 1 (units per second; 5 = full in 0.2 s). Used by Gas, Brake, Left, Right, Handbrake and NOS. | 5 |
| Mobile UI Button Gravity | How fast a released button's input falls back to 0 (units per second). | 5 |
| Mobile Gyro Sensitivity | Multiplier on the accelerometer tilt in Gyro mode. | 2.5 |
The gradual throttle slider does not use Sensitivity / Gravity. Its input is the slider value while touched and 0 when released.
Platform Switching & Warnings
New in V6: RCC keeps Mobile Controller Enabled in sync with the build platform.
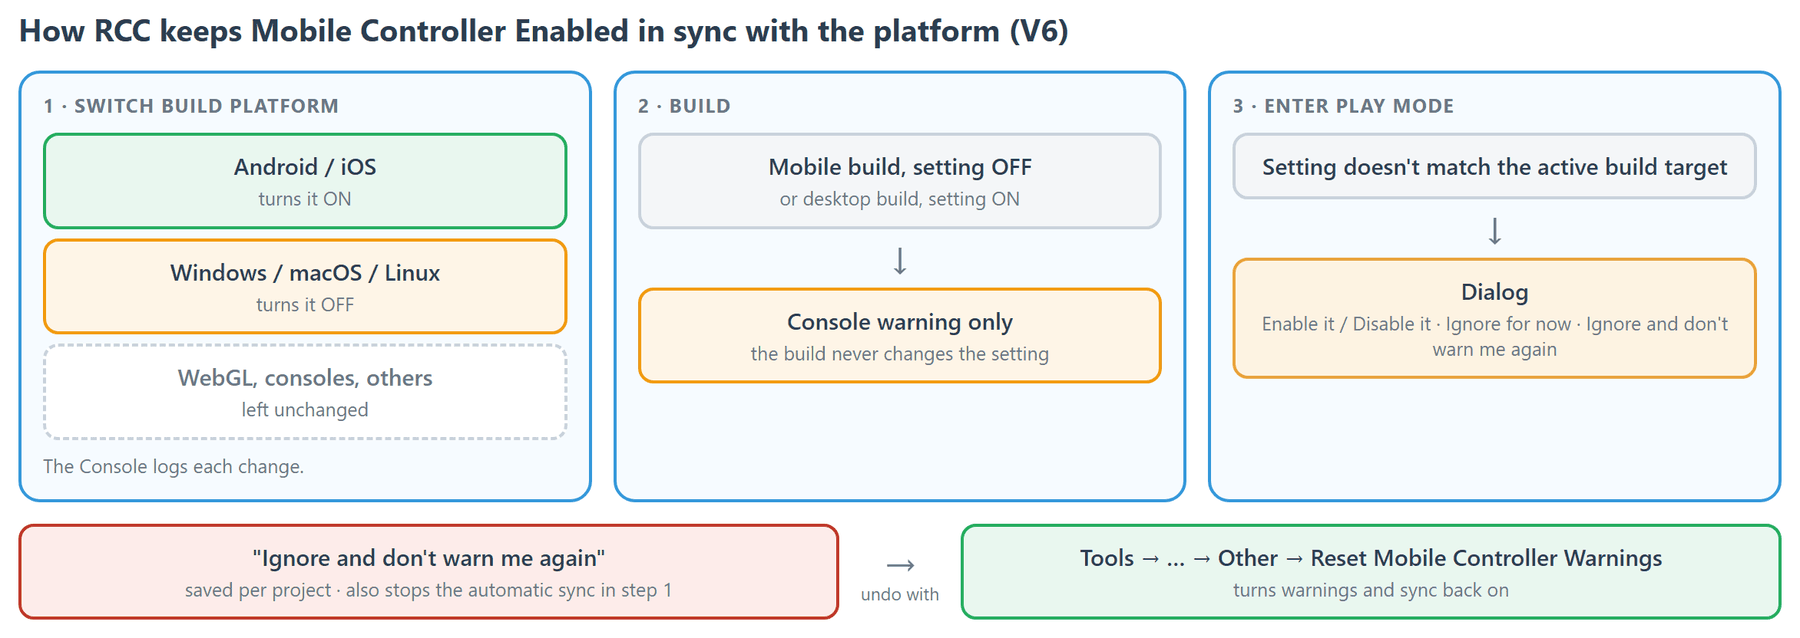
- Switching the build platform to Android or iOS turns it on. Switching to Windows, macOS or Linux turns it off. Other platforms (WebGL, consoles) keep your setting. The Console logs each change.
- Building logs a Console warning if the setting doesn't match the platform (a mobile build with it off, or a desktop build with it on). The build never changes the setting.
- Entering Play mode shows a dialog if the setting doesn't match the active build target. The choices are Enable it / Disable it, Ignore for now, and Ignore and don't warn me again. Any build target other than Android or iOS counts as not mobile, WebGL included.
- Ignore and don't warn me again is saved per project. It also stops the automatic sync on platform switch. If you made this choice in RCC 5.x, it is kept. To turn warnings and sync back on, use Tools → BoneCracker Games → Realistic Car Controller → Other → Reset Mobile Controller Warnings.
- If Mobile Controller Enabled is on and the scene has no mobile buttons, the vehicle inspector shows a warning and an Add RCC Canvas button.
On-foot controls in the Enter-Exit addon follow this setting. See Addon Packages.
Customizing the Canvas
Add RCC Canvas To Scene adds Prefabs/UI/RCC_Canvas.prefab. If the scene already has an RCC Canvas, the command selects it instead. If the scene already has an EventSystem, the canvas's own EventSystem is removed.
The touch widgets are under the canvas's Controller Buttons child:
| GameObject | Component | Used by |
|---|---|---|
| Gas | RCC_UI_Controller |
All types (unless Use Gradual Throttle is on) |
| Gradual Gas (Short) / Gradual Gas (Long) | RCC_UI_Controller (Slider) |
Use Gradual Throttle. The Short slider is the one assigned. |
| Brake, Handbrake | RCC_UI_Controller |
All types |
| Left, Right | RCC_UI_Controller |
Touch Screen, and Gyro without an accelerometer |
| NOS | RCC_UI_Controller |
Touch Screen, Gyro, Joystick |
| Steering Wheel (with its own NOS child) | RCC_UI_SteeringWheelController |
Steering Wheel |
| Joystick | RCC_UI_Joystick |
Joystick |
| Gear UP, Gear Down, Gear | RCC_UI_DashboardButton |
Inactive in the prefab. Activate them if you need manual shifting. |
The full-screen Drag (Orbit) panel orbits the camera when the player drags on empty screen space.
RCC_MobileButtons on the canvas root shows and hides the widgets every frame to match the controller type. You can move, resize and restyle them freely. Do not activate or deactivate them by hand. To remove a widget, clear its field on RCC_MobileButtons, then delete or deactivate the GameObject.
RCC_MobileButtons
| Inspector label | What it does | Shipped value |
|---|---|---|
| Gas Button, Brake Button, Left Button, Right Button, Handbrake Button, NOS Button | Tap buttons for each input. Leave a field empty to skip it. | Assigned |
| Gradual Gas Button | Slider used when Use Gradual Throttle is on. | Gradual Gas (Short) |
| NOS Button Steering Wheel | NOS button shown in Steering Wheel mode. | Assigned |
| Use Gradual Throttle | Uses the slider instead of the Gas button. Can be changed at runtime. | Off |
| Steering Wheel / Joystick | The wheel and joystick widgets. | Assigned |
RCC_UI_SteeringWheelController
| Inspector label | What it does | Shipped value |
|---|---|---|
| Steering Wheel Maximumsteer Angle | Wheel rotation (degrees, each direction) that gives full steering. | 270 |
| Steering Wheel Reset Pos Speed | How fast the wheel returns to center when released. | 20 |
| Steering Wheel Center Dead Zone Radius | Touches closer than this to the wheel center (pixels) don't turn it. | 5 |
RCC_UI_Joystick: Background Sprite sets the movement area, and Handle Sprite is the part that moves. Full steering is reached at the edge of the background.
Changed in V6: a quick tap on the steering wheel no longer leaves it turned. The joystick range no longer depends on screen resolution.
The canvas uses a Canvas Scaler in Scale With Screen Size mode, with a reference resolution of 1920 × 1080 and the Expand screen match mode. Change these to fit your target devices.
Custom Touch UI From Code
To drive RCC from your own touch UI:
- Keep Mobile Controller Enabled on.
- Disable the
RCC_MobileButtonscomponent on the RCC Canvas, or leave the RCC Canvas out of the scene.RCC_MobileButtonsrewrites the inputs every frame and would overwrite yours. - Write to
RCC_MobileButtons.mobileInputsevery frame, beforeRCC_InputManager(execution order −50) reads it.
using UnityEngine;

// -60 = the order RCC_MobileButtons uses, so RCC_InputManager (-50) reads the values in the same frame.
[DefaultExecutionOrder(-60)]
public class MyTouchInput : MonoBehaviour {

    // Set these from your own UI widgets.
    [Range(0f, 1f)] public float throttle;
    [Range(0f, 1f)] public float brake;
    [Range(-1f, 1f)] public float steer;
    [Range(0f, 1f)] public float handbrake;
    [Range(0f, 1f)] public float nos;

    private void Update() {

        RCC_Inputs inputs = RCC_MobileButtons.mobileInputs;

        inputs.throttleInput = throttle;
        inputs.brakeInput = brake;
        inputs.steerInput = steer;
        inputs.handbrakeInput = handbrake;
        inputs.boostInput = nos;

    }

}
To control one vehicle directly without the mobile pipeline, see How To Override Inputs.
Performance Tips
In Edit RCC Settings:
| Inspector label | Section | Effect | Shipped default |
|---|---|---|---|
| Head Lights As Vertex Lights | Optimization | Renders headlights as vertex lights (cheaper than pixel lights). | Off |
| Brake / Reverse / Indicator / Other Lights As Vertex Lights | Optimization | Same for the other light types. | On |
| Do Not Use Any Particle Effects | Optimization | Turns off wheel skid / smoke particles and exhaust smoke. | Off |
| Do Not Use Skidmarks | Optimization | Turns off skidmarks. | Off |
| Override FixedTimeStep → Fixed Timestep | General Settings | A larger timestep lowers physics cost but makes handling less precise. It only applies while Override FixedTimeStep is on. Range 0.005–0.06. | Off → 0.02 |
Collision sparks are set per vehicle with Use Collision Particles on the vehicle inspector.
To optimize distant vehicles, add RCC_LOD to them. When a vehicle is farther than 50 × Lod Bias meters from the RCC camera, RCC_LOD deactivates its audio sources, particle systems and hood / wheel cameras, and reactivates them when it comes closer. Lod Bias defaults to 2, so that distance is 100 m. Lights and wheels are not affected.