Configure mobile controls
Goal: Drive with on-screen controls, select a steering style and save a comfortable button layout.
Prerequisites
Use a scene with a working player vehicle and the RCCP canvas. To add the canvas, see UI and HUD. Test the controls in the Editor first. Then test the touch input and the screen layout on your target device.
Enable touch controls
- Stop Play Mode.
- Open Tools > BoneCracker Games > Realistic Car Controller Pro 2 > Settings > Global Settings.
- In Controls, enable Use mobile controller.
- For a first test, set Mobile controller type to Touch Screen.
- Click Play.
- In the Game view, hold the throttle button with the mouse, then release it.
- Hold the brake button, then release it.
Check: The pedals show and respond. A mouse can test one button at a time. To test steering and throttle together, use two fingers on the device.
Use mobile controller is a project setting. RCCP does not detect the device type. If the setting stays on, a desktop build also uses the on-screen controls. Disable the setting when you go back to keyboard or gamepad driving.
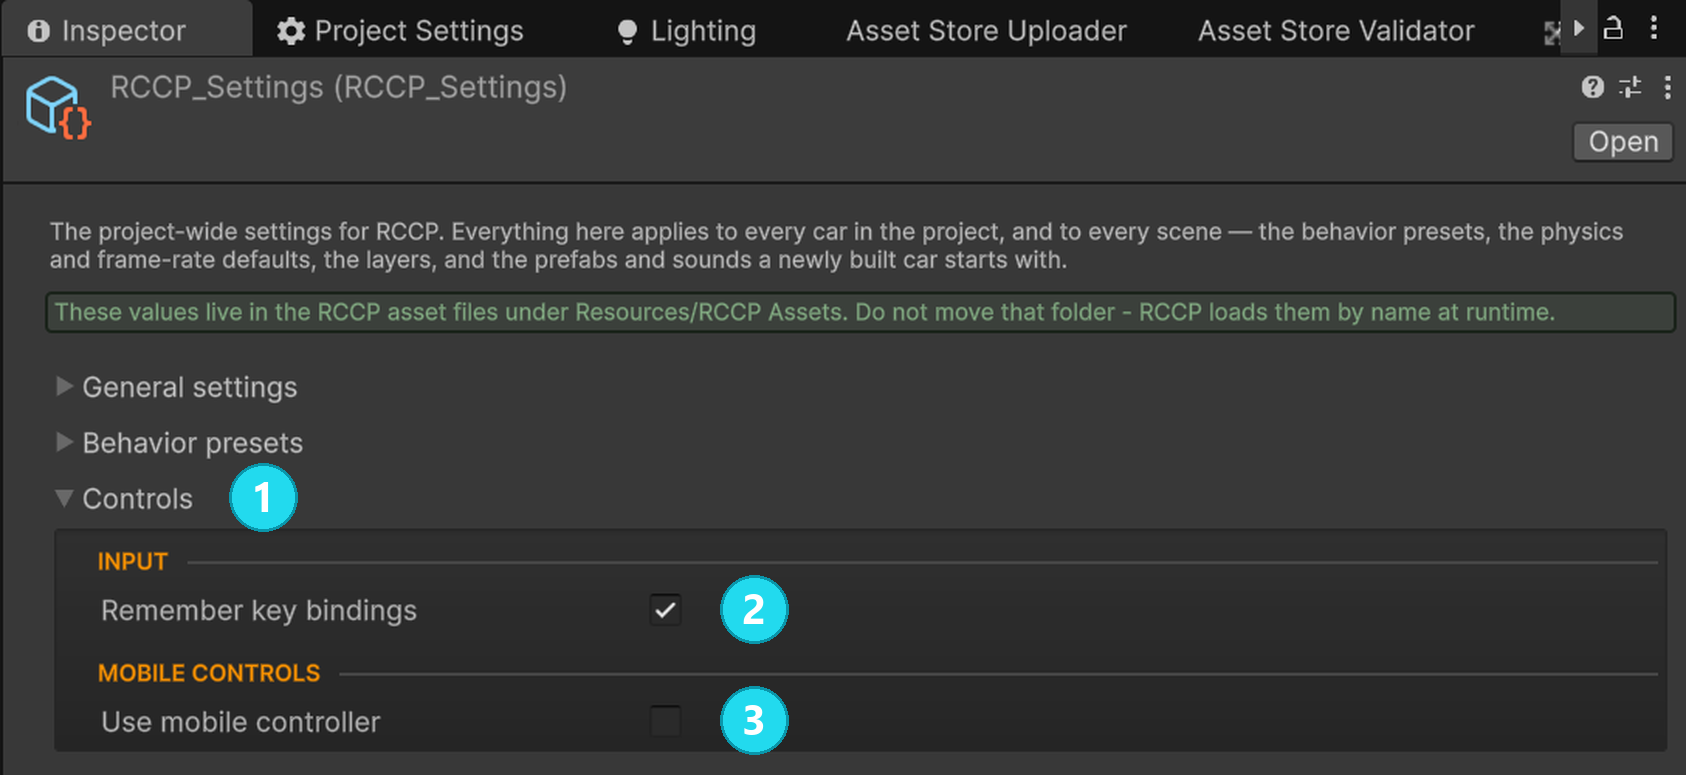
Open the screenshot at full size. 2 Remember key bindings applies to keyboard and gamepad rebinding. When you enable 3 Use mobile controller, the Inspector shows Mobile controller type and Tilt sensitivity.
Choose a steering style
Stop Play Mode. Select a different Mobile controller type, then test again.
| Style | Steering control | First check |
|---|---|---|
| Touch Screen | Left and right buttons. | Hold each button and examine the steering direction. |
| Steering Wheel | A wheel that the player turns with a finger. | Turn the wheel to the left and to the right, then release it. |
| Joystick | A thumbstick. | Drag the stick to the left and to the right, then release it. |
| Gyro | The tilt of the device, from its accelerometer. | Test on a device with an accelerometer. |
All styles use the same throttle, brake, handbrake and nitrous buttons. RCCP shows only the steering controls of the selected style. The nitrous button shows if the vehicle has nitrous. When the player holds the nitrous button, RCCP also applies throttle.
For Gyro, adjust Tilt sensitivity. If a small tilt steers too much, decrease the value. If the steering needs too much tilt, increase the value. When Gyro is selected, RCCP enables the accelerometer of the device.
Move the buttons in the game
The RCCP canvas has a layout editor:
- In Play Mode, open the in-game settings panel.
- On the Controls page, click Edit Controls.
- Drag a pedal to a comfortable position.
- Click Done.
- Restart the game and examine the position.
To go back to the original layout, click Reset Controls.
Check: The pedal stays where you put it. A drag in the layout editor does not accelerate the vehicle. During editing, RCCP stops the driving controls. After editing, RCCP restores the previous control state of the vehicle.
During editing, RCCP also shows the buttons that are not available, for example nitrous on a vehicle without nitrous. The player can then place these buttons in advance. RCCP shows only the steering controls of the current style. Complete the edit before you open other settings panels.
The joystick and the steering wheel measure each touch from their current position on the screen. Because of this, a moved control steers correctly. If the player taps the wheel without a drag, the wheel goes back to the center.
NOTE: RCCP saves a completed layout edit in PlayerPrefs, the local settings store of Unity. The saved layout stays after you exit Play Mode. Most changes to scene objects in Play Mode do not stay.
Check the layout on a device
The supplied canvas uses Shrink with a 1920 x 1080 reference resolution. The settings panel scales from the screen size in the Editor and in device builds. The mobile controls use icons without text from one shared atlas. When the Settings, Customization or Rebind panel opens, RCCP hides the driving controls. When the panel closes, RCCP shows the controls again.
Set the Game view to the resolution of your device. Open each settings category and scroll to the last control.
- Build and run the project on your target phone or tablet.
- Hold the steering and throttle controls together.
- Test the brake and the handbrake.
- Examine each supported orientation and screen shape.
- Make sure that notches and gesture bars do not cover your buttons.
Check: All necessary controls stay visible, reachable and responsive. A mouse test in the Editor cannot confirm multi-touch, tilt or the safe areas of the device.
The touch controls do not work
| What you see | What to check |
|---|---|
| No pedals show | Enable Use mobile controller and add the RCCP UI Canvas. Make sure that the player vehicle is usable. For the visibility rules, see UI and HUD. |
| The pedals show but the vehicle does not move | Examine the engine and the registered player vehicle. See Your First Drive and Scenes and Spawning. |
| No nitrous button shows | The vehicle needs the nitrous addon. A moved button does not enable the feature. |
| Edit Controls or Reset Controls is not available | Enable the on-screen controls first. |
| Rebind Inputs is not available | While the on-screen controls are on, keyboard and gamepad rebinding is disabled. |
| A manual canvas edit has no effect | The saved layout of the player can replace the authored positions. Click Reset Controls to clear the saved layout. |
| A control shows again after you hide it manually | RCCP sets which steering controls are visible. Change the control style instead. |
Create a custom mobile canvas
Keep the movable controls as direct children of the controls container. A direct child is one level below the container in the Hierarchy. The layout manager finds children that have an RCCP touch button, joystick or steering wheel component. The layout manager does not find controls at lower levels. Give each control a unique name, because the manager saves the layout by name.
Add RCCP UI Mobile Layout Manager from Add Component > BoneCracker Games > Realistic Car Controller Pro 2 > UI > Mobile. Then assign these fields:
| Field | Purpose |
|---|---|
| Controls Container | The RectTransform that contains the movable controls. |
| Editor Overlay | The panel that shows while the player arranges the controls. |
| Hide While Editing | Other HUD objects to hide during editing, so that the player cannot press their buttons by accident. |
| Edge Padding | The minimum gap between a control and the container edges, in canvas units. |
The manager saves the positions relative to the container. When a drag ends, the manager anchors the control to the zone where the player drops it. A zone is a corner, an edge center or the center. Test your custom layout at different screen sizes.
If you change the supplied layout after players saved layouts, increase the LayoutVersion constant in the manager script. The manager then deletes the older saved layouts. For custom buttons or code, use EnterEditMode(), ExitEditMode(), CancelEditMode(), SaveLayout(), LoadLayout() and RestoreDefaults().
Adjust the safe area
The RCCP canvas has RCCP UI Mobile Safe Area on the controls rectangle. The component keeps the rectangle inside the usable area that the device reports.
For a custom UI, add the component from Add Component > BoneCracker Games > Realistic Car Controller Pro 2 > UI > Mobile. Add it to a rectangle that stretches across its parent. Put the protected controls below that rectangle.
| Setting | Purpose |
|---|---|
| Apply Horizontal | Fit the left and right edges to the safe area. |
| Apply Vertical | Fit the top and bottom edges to the safe area. |
| Extra Padding | Add an inset on each edge, in screen pixels, in addition to the safe area of the device. |
The component updates when the screen size, the orientation or the reported safe area changes. The component also applies your authored offsets. Do not add the same notch allowance two times.
Build target changes
When you switch the build target to Android or iOS, RCCP offers to enable the on-screen controls. Before Play Mode starts, RCCP also shows a warning if the setting does not match the build target. These prompts can change the saved project setting. The prompts do not add a canvas.
After you accept a prompt, examine Use mobile controller before you test a different platform or share the project.
Next steps
- Performance and Platforms — prepare the rest of a mobile build.
- Controls — go back to keyboard, gamepad or steering wheel input.
- Field Reference — detailed mobile settings.